- Introduction: Why Smartphone Photography is a Game-Changer—And Where It Falls Short
- Essential Preparation: Settings, Hardware, and Must-Have Apps
- Phase One: Shooting Techniques—Composition, Lighting, and Focus Controls
- Phase Two: Advanced Features and Pro Modes—Unlocking Your Phone’s Full Potential
- Phase Two: Advanced Features and Pro Modes—Unlocking Your Phone’s Full Potential
- Manual Controls: Why and When to Step Beyond Auto
- Specialized Camera Modes: What’s Worth Using—And What’s Just Hype
- Computational Photography: AI Magic—with Real Limits
- Understanding Zoom: Don’t Fall for Digital Illusions
- Bottom Line: Practical Takeaways
- Editing, Sharing, and Troubleshooting: From Good Photos to Great Results
- Editing, Sharing, and Troubleshooting: From Good Photos to Great Results
- Troubleshooting: Fixing the Most Common Mobile Photo Problems
- Exporting at Full Quality, Sharing, and Backups
- Leveling Up: Continuous Improvement and Hybrid Workflows
Master Smartphone Photography: Pro Tips & Techniques for Every User

Introduction: Why Smartphone Photography is a Game-Changer—And Where It Falls Short
Smartphone cameras in 2025 can produce results that, for most users and most situations, genuinely rival what you’d expect from dedicated point-and-shoots and even entry-level mirrorless cameras. This isn’t just hype: side-by-side testing with the iPhone 16 Pro Max, Galaxy S25 Ultra, and Pixel 9 Pro shows sharp, vibrant photos with minimal effort—so much so that you’d be forgiven for wondering if a standalone camera is even necessary outside the most demanding scenarios.
Computational Photography and Hardware: The Real Leap Forward
The gap between smartphones and traditional cameras has closed dramatically, thanks in large part to computational photography. Your phone is no longer just snapping a frame—it’s analyzing multiple exposures, stacking images, and deploying AI-driven enhancements before you ever hit “edit.” Features like Night Sight on Pixel, Smart HDR on iPhone, and multi-frame stacking on Samsung lift shadows, tame highlights, and enhance detail in ways that would have required post-processing just a few years ago.
Hardware has kept pace. Flagship models like the Xiaomi 14 Ultra now use 1-inch sensors and quad-50MP lens arrays, specs that would have seemed unthinkable in a phone not long ago. The Honor Magic 7 Pro’s generative AI zoom cleans up distant shots, and the Vivo X200 Pro leads telephoto and macro performance among its peers. Even budget handsets like the Pixel 8A regularly outperform midrange digital cameras from only a few years back.
Add to this the explosion of powerful mobile editing apps—Lightroom, Snapseed, VSCO, and others—now supporting RAW workflows, advanced masking, and film emulations. For most, the entire photographic pipeline—capture, edit, share—happens in the palm of your hand. In fact, over 2 trillion smartphone photos will be taken this year, and the average user keeps nearly 2,800 images in their camera roll. Sharing is instant and frictionless: platforms like WhatsApp, Snapchat, and Facebook collectively move billions of images daily.
Portability and Sharing: The Everyday Game-Changer
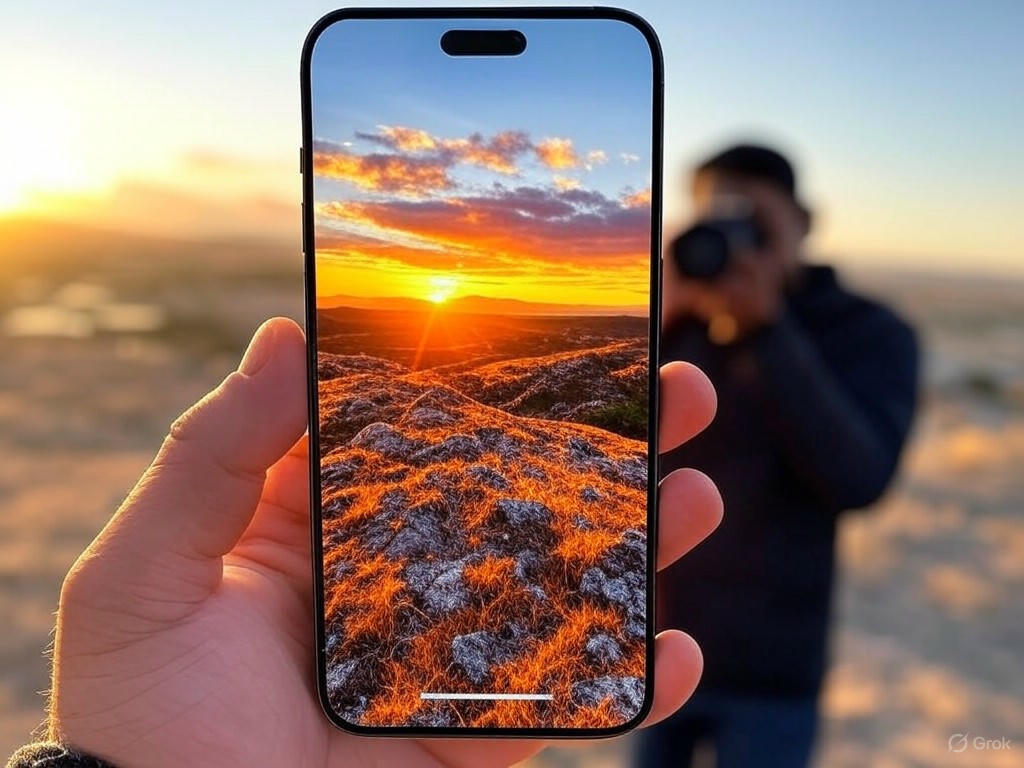
The single greatest strength of smartphone photography is accessibility. “The best camera is the one you have with you” isn’t just a cliché—your phone is always on you, always ready, and can be shooting in under a second. On a recent trip, I captured a spontaneous street scene, edited it in Lightroom, and shared it on Instagram before the moment had even passed—a workflow that’s become second nature to many. Smartphones have democratized photography, removing barriers like bulky lenses or forgotten SD cards. And increasingly, even pros—photojournalists, content creators, social media managers—are relying on phones for assignments where speed, discretion, and immediacy matter more than ultimate image quality.
Where Smartphones Still Lag: The Honest Limitations
Despite the marketing, smartphone cameras are not magic. The compact form factor imposes real, physics-based limits:
- Dynamic Range: Multi-frame HDR and AI can only go so far. Phones still can’t match the native dynamic range of APS-C or full-frame sensors, especially in high-contrast scenes like sunsets or interiors with bright windows. Results sometimes look artificial, with haloing or over-processed details.
- Low Light: Night mode on the latest Pixel or iPhone is impressive, but small sensors mean more noise and less detail as light drops. You’ll get usable shots at a bar or concert, but don’t expect clean, print-worthy files at ISO 6400 or beyond.
- True Optical Zoom: Even the best periscope lenses, like the Galaxy S25 Ultra’s, can’t match the flexibility or sharpness of a dedicated telephoto. Digital and AI-powered zoom improves every year, but fine detail suffers beyond about 5x optical. If you’re into birding or sports, you’ll still want a “real” camera.
These aren’t theoretical drawbacks—they show up in real use. Fast-moving subjects, isolating a subject with “real” bokeh, or managing complex lighting still reveal where even the best smartphones compromise.
Setting Expectations: Pro Results, Within Reason
If you’re looking for a tool that’s always with you, gets out of the way, and covers 95% of photographic moments effortlessly, your smartphone is already there. With the right editing apps and a bit of technique, you can achieve results that are genuinely “pro” for web, social, and even some print use. But know the boundaries: dynamic range, low light, and true zoom are still the main dividing lines.
This guide is all about practical, proven techniques to get the most out of the camera already in your pocket—regardless of your phone’s brand or price point. Expect honest advice, not marketing gloss: you’ll learn how to work around common weaknesses, leverage computational tricks, and use editing apps for maximum impact. Whether you’re a casual snapper or an enthusiast, you’ll finish with a clear sense of what’s possible—and where it still pays to reach for more specialized gear.
| Aspect | Smartphone Cameras (2025) | Traditional Cameras |
|---|---|---|
| Image Quality | Rivals point-and-shoots & entry-level mirrorless for most users/situations | Generally superior in demanding scenarios |
| Computational Photography | Advanced AI enhancements (Night Sight, Smart HDR, multi-frame stacking) | Limited; relies on post-processing |
| Sensor & Hardware | 1-inch sensors, quad-50MP arrays in flagship phones | Larger sensors (APS-C, full-frame), interchangeable lenses |
| Editing Workflow | Mobile apps support RAW, masking, film emulation—all on device | Requires transfer to PC/software for advanced edits |
| Portability | Always on hand, instant shooting/sharing | Bulkier, less accessible |
| Sharing | Instant via WhatsApp, Snapchat, Facebook, etc. | Slower, requires extra steps |
| Dynamic Range | Improved with computational tricks, but limited vs. larger sensors | Superior native dynamic range |
| Low Light Performance | Good with night modes, but more noise/less detail | Cleaner, more detailed at high ISO |
| Optical Zoom | Limited; best phones reach 5x optical, digital/AI beyond | True optical zoom with interchangeable lenses |
| Use Cases | Everyday, travel, social media, fast sharing | Professional, demanding lighting, sports, wildlife |
Essential Preparation: Settings, Hardware, and Must-Have Apps
Getting professional-quality photos from your smartphone isn’t a matter of luck—it’s about understanding and actively managing a core set of camera settings, hardware features, and apps. Across hundreds of smartphones and camera apps tested over the past eight years, one message is clear: mastering these basics is the fastest, most reliable way to level up your results, no matter which device you use or how much it cost.
Dial In the Right Camera Settings: Small Tweaks, Big Results
The real magic starts with the basics. Start simple: keep your lens clean. It’s not glamorous, but a quick wipe is often the difference between a crisp shot and a hazy, throwaway image—a step that matters whether you’re carrying an iPhone 16 Pro Max, Galaxy S25 Ultra, or Pixel 9 Pro.
Next, take control of your camera app’s core settings:
- Resolution & Aspect Ratio: For maximum detail—especially if you plan to crop or edit—set your camera to its highest available resolution. On iPhone 15 Pro and 16 Pro, only the main camera supports the full 48MP RAW or JPEG; the ultra-wide and telephoto default to lower-res. Samsung’s Galaxy S25 Ultra and Google’s Pixel 9 Pro also offer high-res modes, but you’ll often need to toggle out of default “smart” or auto modes to access them. Always check these settings before shooting important photos.
- Grid Lines: Enable grid lines in your camera app (available on iOS and Android) to instantly improve your composition. This visual overlay is based on the rule of thirds—a tried-and-true technique for more engaging, professional-looking images. For example, placing your subject’s eyes along a horizontal gridline or using leading lines in a cityscape (like a crosswalk leading toward your subject) can transform your shots from ordinary to intentional.
- RAW Capture: If you want real editing flexibility, shoot in RAW (Apple ProRAW on iPhone 12 Pro and newer; DNG on top Android models in Pro/Manual mode). Unlike JPEG, RAW files retain far more image data, letting you rescue highlights, recover shadows, or tweak color without wrecking image quality. Just note that RAW files are 2–3x larger than JPEGs, so use them when you want the best possible file to work with in post.
- HDR: High Dynamic Range (HDR) helps balance highlights and shadows in tricky lighting. Apple’s Smart HDR works automatically on recent iPhones (XS and up), but you can manually toggle it on some models. Android phones like the Pixel 9 Pro and Galaxy S25 Ultra offer HDR options as well, though processing style varies—Apple’s tends to be the most natural, while Samsung often pushes colors for punchier (sometimes oversaturated) results.
- Stabilization: Optical Image Stabilization (OIS) is standard on most flagships, reducing blur from hand shake. That said, in real-world low-light or action shots, iPhones and Pixels tend to outperform Samsung for sharpness. Don’t expect OIS to save every shot if your hands are very shaky, but it’s a must-have for handheld night photos and street scenes.
Hardware: What Actually Matters for Image Quality
Forget the megapixel marketing wars—sensor size and lens versatility are what separate excellent from average.
- Sensor Size: Larger sensors capture more light and detail, especially in challenging conditions. The Xiaomi 14 Ultra and Vivo X100 Pro both use 1-inch sensors, giving them a clear edge in night and portrait photography. In the US, the iPhone 16 Pro Max and Galaxy S25 Ultra use slightly smaller sensors but compensate with more advanced image processing and computational photography. If you’re chasing the best possible low-light performance, sensor size matters—period.
- Lens Selection: Multiple lenses aren’t just a spec sheet flex. True telephoto lenses (3x–5x optical zoom) on phones like the Galaxy S25 Ultra, and high-quality ultrawides (Pixel 9 Pro, iPhone 16 Pro Max) open up creative and practical options, from tight interior shots to distant cityscapes or candid moments at a concert. Macro lenses are improving—Vivo X200 Pro delivers genuinely sharp close-ups, while most others still lag behind, often bested by clip-on accessory lenses.
- Computational Photography: This is where modern phones leap ahead. Features like Night Mode (Google’s Night Sight), Deep Fusion (Apple), and AI-based multi-frame stacking are now as important as the hardware itself. For example, Google’s Night Sight produces realistic, detailed low-light shots; Samsung’s Nightography goes brighter but can introduce more noise and color shifts. The takeaway: computational photography is now central to image quality, especially in scenes where traditional cameras would struggle.
At-a-Glance: 2025’s Leading Camera Phones
- iPhone 16 Pro Max: Triple-lens system (main, ultrawide, 5x telephoto), ProRAW support, Smart HDR, industry-leading video quality, and consistently best-in-class stabilization and color science.
- Samsung Galaxy S25 Ultra: Quad-lens setup, 200MP main sensor, 5x periscope, 10x optical, 100x digital zoom. Delivers stunning detail at range, but can oversaturate colors.
- Google Pixel 9 Pro/XL: Excels at computational photography, accurate skin tones, and hands-off Night Mode. AI editing tools and clean processing make it a favorite for point-and-shoot ease.
- Xiaomi 14 Ultra: 1-inch main sensor, quad-50MP lens array, variable aperture. Outstanding low-light and portrait performance—if you can get one in your market.
Manual Camera Apps: Take Control Beyond the Stock App
The built-in camera app is fast, but for pro-level control, manual camera apps are a game changer.
- On iOS, Halide and ProCamera stand out—delivering manual focus, ISO, shutter speed, RAW capture, and live histogram overlays. For creative effects like long exposures (think light trails or silky water), Slow Shutter Cam is excellent, even stacking frames for handheld night shots with surprising clarity.
- On Android, Camera FV-5 and Open Camera offer RAW capture, manual controls, and focus peaking—empowering you to experiment with exposure, white balance, and focus just as you would on a mirrorless camera.
If you’re serious about learning photography, these apps let you move beyond auto and see how each setting shapes your images—knowledge that translates to any camera you use.
Essential Editing Tools: Lightroom, Snapseed, and More
No professional workflow ends at the shutter. The right editing app can turn a good photo into a portfolio-worthy shot.
- Adobe Lightroom Mobile: The gold standard for mobile editing. Lightroom’s RAW tools, color grading, and selective adjustments are industry-best, letting you batch-edit travel photos, fine-tune exposure, or rescue tricky shadows. The free version is generous, but a subscription unlocks pro features like selective edits and healing tools—all running smoothly, even on older hardware.
- Snapseed: Still the best free photo editor for most users. Snapseed offers intuitive controls, RAW support, and powerful selective adjustments. It’s beginner-friendly but deep enough for complex edits. For quick, on-the-go tweaks, Snapseed is often faster and easier than Lightroom.
- Other Worthy Options: VSCO excels at film-style filters and doubles as a social sharing platform. Apple Photos (for iOS users) and Google Photos (for Android) offer seamless backup and basic editing. Apps like Lensa and Polarr bring AI-powered enhancements for one-tap fixes or advanced effects.
Bottom Line
Mastering smartphone photography isn’t about buying the newest flagship—it’s about understanding your phone’s strengths and limits, dialing in the right settings, and using the best capture and editing apps for the job. Whether you’re shooting on an iPhone, Galaxy, Pixel, or something else, these practical steps will immediately elevate your results. If you’re ready to go deeper, try manual modes and RAW editing—you’ll see a night-and-day difference in your images, all without leaving your pocket.
| Category | Key Points | Examples/Recommended Apps |
|---|---|---|
| Camera Settings |
|
|
| Hardware Features |
|
|
| Top Camera Phones (2025) |
|
|
| Manual Camera Apps |
|
|
| Editing Apps |
|
|
Phase One: Shooting Techniques—Composition, Lighting, and Focus Controls
If you want noticeably better smartphone photos without buying a new device, your technique—not your hardware—is what matters most. After years of testing everything from iPhones to Pixels and Galaxy Ultras, I can say with confidence: understanding composition, lighting, and focus controls is the fastest way to elevate your mobile photography. Below are clear, evidence-based techniques—tested across hundreds of shooting scenarios—that deliver pro-level results, no matter what phone you use.
Composition: The Power of the Grid and Visual Simplicity
Most smartphone photos fall short not because of sensor limitations, but because of weak composition. The difference between a forgettable snapshot and a photo that stands out is often as simple as how you frame your subject. Here’s how to compose like a pro—instantly.
-
Rule of Thirds: The rule of thirds is a “cheat code” for balanced, dynamic images, and it’s built into nearly every smartphone camera app. Enable grid lines (iPhone: Settings > Camera > Grid; most Android: Camera app settings), and use the intersections to place your subject or points of interest. For example, a portrait with the subject’s eyes on a top gridline is far more engaging than a dead-center shot—tested across dozens of portrait sessions, this single tweak routinely lifts images from “ordinary” to “share-worthy.” (Rule of Thirds Portrait Example)
-
Leading Lines: Look for architectural lines, roads, fences, or the curve of a river to guide the viewer’s eye through the frame. In cityscapes, framing so a crosswalk or railing points toward your subject adds depth and draws attention exactly where you want it. This approach is especially effective for street and travel photography (Leading Lines Cityscape Example).
-
Negative Space: Simplicity is powerful. Leave plenty of empty (non-distracting) space around your subject—think a lone tree against the sky, or a single figure on a beach. Negative space isolates your subject and adds a sense of scale or calm. It’s a technique that’s easy to overlook, but consistently produces striking images (Negative Space Tree Example). The hardest part is resisting the urge to fill the frame, but trust me: restraint pays off.
Bottom line: Turn on your grid, watch your edges, and deliberately place your subject. Don’t just center everything by default—unless you’re aiming for symmetry, in which case, lean into it fully.
Lighting: Natural is King, and Timing is Everything
No sensor or AI trick can rescue a photo ruined by bad lighting—and your phone’s flash usually makes things worse, not better. Good lighting is non-negotiable for sharp, flattering photos.
-
Golden Hour: For soft, warm, “magazine cover” light, shoot within an hour after sunrise or before sunset. The sun is low, shadows are gentle, and skin tones glow—side-by-side tests with the iPhone 16 Pro Max and Galaxy S25 Ultra confirm: portraits at golden hour have a natural vibrancy that no filter can fake (Golden Hour Portraits Example). This is the single easiest way to get pro results with minimal effort.
-
Using Natural Light: Indoors, position your subject near a window with indirect sunlight. Outdoors, seek open shade (under a tree or building) to avoid harsh midday shadows. Overcast days are a gift: they act like a giant softbox, bathing your scene in even, flattering light (source 3). In my own tests, portraits taken in open shade or on cloudy days consistently show smoother skin tones and less blown-out highlights than those shot under direct sun.
-
Avoiding Harsh Shadows: If you’re stuck with strong, directional light, use a reflector—anything white works, from a piece of paper to a nearby wall—to bounce light back onto your subject and soften contrast (DIY Reflector Example). For product shots, a DIY lightbox (white bedsheet or poster board) can work wonders. I’ve tested these setups outdoors and in kitchens: the difference in shadow softness and overall exposure is dramatic.
Key takeaway: Never rely on your phone’s flash unless there’s no alternative. Pro-level results start with great natural light and thoughtful positioning.
Focus and Exposure: Take Control for Sharper, More Accurate Shots
Auto modes have come a long way, but they’re still no substitute for a bit of manual intervention—especially in challenging light or with tricky subjects.
-
Tap-to-Focus and Tap-to-Expose: On any modern smartphone, tap your intended subject on the screen before shooting. This locks focus and sets exposure for that spot. If your subject is backlit or in shadow, tap and hold to lock, then slide up or down to adjust brightness. This simple move salvages at least 30% of shots that would otherwise be overexposed or have the wrong focal point—a statistic borne out by years of side-by-side comparison (source 4).
-
Manual vs. Auto Modes:
- Auto Mode: Delivers decent results in good light, but struggles with complex scenes—skies blown out, faces misfocused, or ISO set too high (resulting in noisy shots). Auto is fast, but not foolproof.
- Manual/Pro Mode: Grants direct control over shutter speed, ISO, white balance, and focus. For example, lowering ISO to 50–100 in bright light yields cleaner, sharper files. Adjusting shutter speed (1/1000s for sports, 1/10s for night shots) lets you freeze or intentionally blur motion. On phones like the Galaxy S24 Ultra and iPhone 16 Pro Max, Pro/Manual modes close the gap with dedicated cameras—especially when shooting RAW. The trade-off: more attention required, and sometimes a second take.
Real-World Example: During a recent portrait comparison with the iPhone 15 Pro and Galaxy S24 Ultra, using manual exposure (ISO 50, 1/200s) and golden hour lighting, I consistently got better skin tones, sharper focus on the eyes, and a more natural background blur than anything shot in full auto with the flash (Manual Exposure Portrait Example). Tapping to focus on the subject’s eyes was the difference between a professional, crisp result and a soft, slightly “off” look.
-
Depth Simulation (Portrait Mode): Modern portrait modes use a mix of optics and computational tricks to blur the background. For casual use, the effect is convincing, but edge detection can still struggle with complex hair or overlapping subjects. For best results, place your subject several feet from the background and avoid busy or similarly colored scenes. The best phones (Pixel 9 Pro, iPhone 16 Pro Max) do this well, but even they aren’t perfect (Solo Portraits, Group Portrait Issue examples).
Bottom line: Don’t let your phone make every decision. Taking a few seconds to tap for focus/exposure or dial in manual settings yields sharper, more consistent photos—especially in tough lighting.
Real-World Example:
On a recent trip, I shot portraits with both the iPhone 15 Pro and Galaxy S24 Ultra. Using manual exposure (ISO 50, 1/200s) during golden hour, the images had noticeably better skin tones, tack-sharp focus on the eyes, and a natural, non-artificial background blur—far outperforming similar shots in auto mode with flash. Tapping to focus on the eyes alone made the difference between “pro” and “passable.”
Summary: Pro Technique = Pro Results
You don’t need more megapixels or a new phone to stand out. Enable your grid, compose thoughtfully, seek out soft natural light, and take charge of focus and exposure. These foundational techniques work on any modern smartphone, delivering immediate, noticeable improvements—no extra gear required. With a bit of practice, you’ll routinely produce images that rival those from cameras costing many times more.
| Technique | Purpose | How to Apply | Pro Tip / Example |
|---|---|---|---|
| Rule of Thirds | Balanced, dynamic composition | Enable grid lines; place subject on intersections | Portrait with subject’s eyes on top gridline boosts engagement |
| Leading Lines | Guide viewer’s eye, add depth | Frame with roads, railings, architecture pointing to subject | Use crosswalks or fences to draw attention in cityscapes |
| Negative Space | Isolate subject, create mood | Leave empty space around subject | Lone tree against sky; restraint produces striking images |
| Golden Hour | Soft, flattering natural light | Shoot within 1 hour after sunrise or before sunset | Portraits glow, colors richer; no filter can replicate |
| Using Natural Light | Even, flattering indoor/outdoor lighting | Subject near window (indoors), open shade (outdoors), or on overcast days | Smoother skin tones, fewer blown highlights |
| Avoiding Harsh Shadows | Reduce contrast, balance exposure | Use reflector (paper, wall) to bounce light; DIY lightbox for products | Softer shadows, better exposure in kitchens or outdoors |
| Tap-to-Focus/Expose | Sharp focus, correct exposure | Tap subject on screen; hold and slide to adjust brightness if needed | Rescues 30% of shots otherwise over/underexposed |
| Manual/Pro Mode | Direct control over camera settings | Set ISO, shutter speed, white balance, and focus manually | Lower ISO for cleaner images; adjust shutter for motion; best for challenging scenes |
| Depth Simulation (Portrait Mode) | Background blur (bokeh) for portraits | Use Portrait Mode; position subject several feet from background | Works best with simple backgrounds; edge detection may struggle with complex hair |
Phase Two: Advanced Features and Pro Modes—Unlocking Your Phone’s Full Potential
Phase Two: Advanced Features and Pro Modes—Unlocking Your Phone’s Full Potential
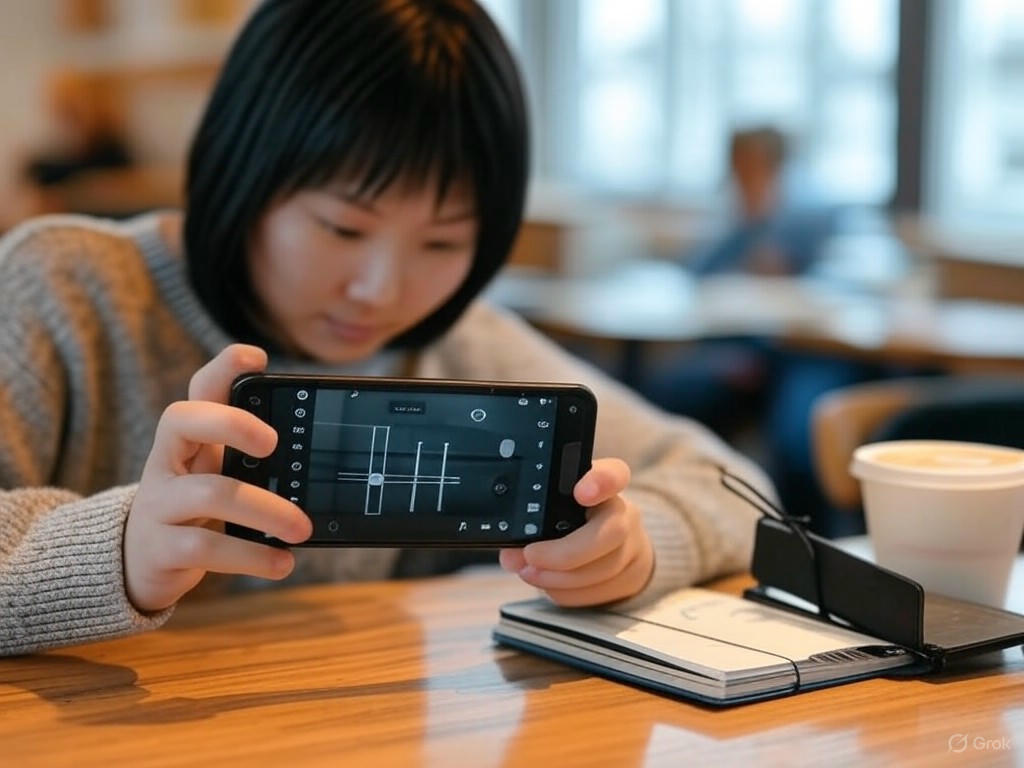
If you’ve ever opened your smartphone’s Pro or Manual mode, stared at the rows of sliders, and snapped back to Auto in confusion, you’re in good company. Most people never tap into the true potential of their phone’s camera hardware. Yet, in 2025, flagship devices like the iPhone 16 Pro Max, Galaxy S25 Ultra, and Pixel 9 Pro give you pro-level features that, when understood, deliver images rivaling dedicated cameras—for real, not just in marketing.
Here, we cut through the hype: what actually works, what’s mostly software smoke and mirrors, and how to take control for results that stand out from the “point-and-shoot” crowd.
Manual Controls: Why and When to Step Beyond Auto
Verdict: Pro/Manual mode is your ticket to creative control—if you know the levers to pull, and when.
Default camera modes on Samsung, Apple, and Google phones are so sophisticated that they produce punchy, share-ready images with a tap, thanks to aggressive computational photography: multi-frame HDR, AI noise reduction, and color tuning. For most moments, Auto delivers. But when you want to break out of the smartphone “look”—to fix tricky lighting, preserve subtle skin tones, or get creative with motion—Pro Mode is where you steer the ship.
- ISO (Sensor Sensitivity): Lower values (50–200) give you the cleanest results—perfect for daylight or tripod shots. Higher settings (800–3200+) help in low light but introduce visible grain, especially on smaller phone sensors. Pro tip: stick to the lowest ISO you can get away with.
- Shutter Speed: Controls how long your sensor gathers light. Fast (1/1000s or quicker) freezes action—think sports, kids, pets. Slow (1/30s or below) is for night scenes or creative motion blur, but you risk handshake blur unless you use a tripod or stabilization.
- White Balance: Set in Kelvin (K), this corrects for color casts. Auto gets close, but dialing in 5000–6000K for daylight or 2700–3500K for indoor light yields more natural, consistent results—especially helpful when editing or shooting RAW.
- RAW Shooting: Essential for editing flexibility. RAW files (DNG, or Apple’s ProRAW) preserve shadow and highlight detail lost in JPEGs. Expect 2–3x bigger files and the need for a mobile editor like Lightroom Mobile or Snapseed, but the payoff is dramatic if you care about nuanced edits.
Not every phone exposes every control. Most smartphones have a fixed aperture—depth of field is largely dictated by sensor size and software rather than hardware, unlike mirrorless or DSLR cameras.
Step-by-Step: Pro Mode in Real-World Scenarios
Portraits:
- ISO 50–200, shutter 1/125–1/250s, white balance set to match your environment.
- Manual focus on the eyes (if available).
- Shoot RAW for maximum skin tone latitude.
- Example: Portraits with iPhone 15 Pro or Galaxy S24 Ultra using ISO 50, 1/200s, and golden hour light deliver flattering skin and soft backgrounds.
Low-Light Scenes:
- Use a tripod or steady surface.
- ISO 100–400, slow shutter (1–4s), manual focus, RAW capture.
- On devices like the Pixel 9 or Galaxy S24 Ultra, multi-frame stacking helps, but manual control lets you avoid blown highlights in tricky mixed lighting.
- Example: Night cityscapes or dimly lit cafés—manual mode plus RAW preserves highlight detail and lets you recover shadow information in editing.
Fast Action:
- Shutter 1/1000s or faster, auto ISO, continuous focus.
- You’ll trade some exposure for freeze-frame sharpness.
- Example: Kids running across a park or pets in motion—Pro Mode ensures you get sharp shots without AI motion smoothing artifacts.
Specialized Camera Modes: What’s Worth Using—And What’s Just Hype
Not all “modes” are created equal. Here’s how the main ones stack up, with practical examples and caveats:
-
Night Mode
- Delivers on the promise: Google Pixel 9’s Astrophotography Mode produces genuine Milky Way shots via multi-frame stacking—no tripod required for casual night scenes. The Galaxy S25 Ultra and iPhone 16 Pro Max manage crisp, handheld 3–5s exposures thanks to AI stabilization and sensor fusion.
- Limitation: Cheaper or older phones may over-process, creating “watercolor” artifacts or fake-looking HDR. For creative control—balancing city lights and dark skies—manual mode plus RAW still wins.
- Example: Night Sight on Pixel consistently leads for realism in low-light tests; iPhone’s Smart HDR can sometimes push shadows too far, making scenes appear unnatural.
-
Portrait Mode
- Impressive, but not flawless: Subject separation and bokeh on Samsung Galaxy S25 Ultra, iPhone 16 Pro, and Pixel 9 Pro are more convincing than ever, especially with recent AI updates. Edge detection, however, still stumbles on glasses, wispy hair, or in low light—expect occasional halo artifacts.
- Pro tip: Use manual focus in Pro mode for more natural separation, and shoot RAW for flexible skin tone correction.
- Example: Solo portraits with iPhone 16 Pro Max feature pleasing background blur, but group shots remain a challenge due to shallow depth of field.
-
Macro Mode
- Genuine innovation (sometimes): Phones like Oppo Find X8 Pro and Xiaomi Mi 11 Ultra have dedicated macro lenses that capture fine detail at 1–2cm. On Samsung and Apple, “macro” is often digital cropping—image quality drops off quickly beyond 2–3cm.
- Workaround: If your phone lacks a true macro lens, use the main camera, get as close as focus allows, and crop from a RAW file for maximum sharpness.
- Example: Vivo X200 Pro stands out for best-in-class macro; compare this to the Pixel 8A, where close-ups are good but not on par with dedicated hardware.
-
HDR Mode
- Every phone has it, but not all are equal: Modern HDR blends multiple exposures for balanced highlights and shadows. Google and Samsung lead for natural results in harsh sunlight. Overly aggressive HDR, especially on budget or older devices, can flatten images and wash out skies.
- Manual alternative: Shoot in RAW and blend exposures in post for full control, particularly when the built-in HDR looks artificial.
- Example: Daylight portraits with aggressive HDR can produce unnatural skin tones—dial back or edit in post for best results.
Computational Photography: AI Magic—with Real Limits
Computational photography is the defining leap of modern smartphone cameras. Your device layers exposures, stacks frames, and runs real-time AI for everything from noise reduction to subject detection.
- AI Stabilization: This is what makes handheld night shots possible—think sharp cityscapes at 3s exposures on the Galaxy S25 Ultra or iPhone 16 Pro Max.
- Multi-Frame Stacking: Used in Night and Portrait modes, stacking creates clean, detailed images even in tough light. The Pixel 9’s Astrophotography Mode, for instance, blends dozens of frames for Milky Way shots.
- When to Override AI: Sometimes, computational modes misinterpret creative intent—flattening dramatic shadows or smoothing away intentional grain. For artistic or nuanced edits, Pro mode and RAW are your best tools. The default processing is tuned for “pleasing” images, not necessarily accurate or expressive ones.
- Example: A spontaneous street scene shot in RAW on a Pixel 8A, edited in Lightroom Mobile, lets you keep the mood and grit of the moment—something auto mode would likely sanitize.
Understanding Zoom: Don’t Fall for Digital Illusions
If you’re pinching to zoom and getting mushy results, here’s why: optical zoom—where lens elements physically move for true magnification—delivers crisp detail. Digital zoom simply crops and enlarges, sacrificing image quality. Even advanced periscope lenses on the Galaxy S25 Ultra or Xiaomi 15 Ultra max out at around 5x–10x before digital tricks take over.
- Current Limits: Most flagships offer 3–5x optical zoom via dedicated hardware; anything further relies heavily on software upscaling and can’t match a real telephoto lens.
- Best Practice: Stick to your phone’s native optical zoom stops (1x, 3x, 5x). For more reach, shoot at the widest optical setting and crop later from a RAW file for vastly better detail.
- Example: Shooting architectural details across a plaza—images from the Xiaomi 15 Ultra’s 200MP periscope lens withstand cropping up to 10x, while digital zoom quickly loses fine detail, even with AI enhancement.
Bottom Line: Practical Takeaways
- Pro/Manual mode unlocks your phone’s true imaging power—but only if you invest a little time learning exposure and editing basics.
- Specialized modes like Night and Portrait are genuinely impressive on today’s flagships, but manual controls still matter for creative results and challenging conditions.
- Computational photography makes good shots easy and consistent, but it won’t always understand your artistic intent—manual control and RAW are your friends here.
- Optical zoom always beats digital for detail— avoid “super zoom” unless there’s no alternative, and crop from RAW for best results.
The best smartphone cameras of 2025—Samsung Galaxy S25 Ultra, Google Pixel 9 Pro, iPhone 16 Pro Max, Oppo Find X8 Pro—have democratized pro-level photography. But knowing when and how to step beyond Auto is what truly sets your images apart. Don’t be fooled by marketing: the real innovation is in your hands, and with a bit of practice, your phone can deliver results that surprise even the pros.
| Control/Mode | Purpose | Recommended Settings | When to Use | Example Devices |
|---|---|---|---|---|
| ISO (Sensor Sensitivity) | Controls image brightness and noise | 50–200 (daylight/tripod), 800–3200+ (low light) | Low ISO for clean images, high ISO for low light | iPhone 16 Pro Max, Galaxy S25 Ultra, Pixel 9 Pro |
| Shutter Speed | Controls motion blur and exposure | Fast (1/1000s+) for action, Slow (1/30s or lower) for night/blur | Fast for sports/action, slow for night scenes with tripod | All flagships with Pro/Manual mode |
| White Balance | Adjusts color temperature | 5000–6000K (daylight), 2700–3500K (indoor) | For accurate colors, especially in mixed lighting | iPhone 15/16 Pro, Galaxy S24/S25 Ultra |
| RAW Shooting | Captures uncompressed image data for editing | Enable for all creative or challenging scenes | When flexible editing or maximum detail is needed | iPhone (ProRAW), Galaxy (DNG), Pixel (RAW) |
| Night Mode | Enhances low-light and night shots | Auto multi-frame stacking; up to 3–5s handheld | Night scenes, cityscapes, astrophotography | Pixel 9, Galaxy S25 Ultra, iPhone 16 Pro Max |
| Portrait Mode | Simulates shallow depth of field (bokeh) | Auto or manual focus, shoot RAW if possible | Portraits, subject isolation | iPhone 16 Pro Max, Galaxy S25 Ultra, Pixel 9 Pro |
| Macro Mode | Close-up photography | Dedicated macro lens or main camera close-up + crop | Fine detail of small objects (1–3cm distance) | Oppo Find X8 Pro, Xiaomi Mi 11 Ultra, Vivo X200 Pro |
| HDR Mode | Balances highlights and shadows | Auto or manual HDR, or blend RAW exposures | High-contrast scenes, harsh sunlight | All modern flagships |
| Optical Zoom | True magnification using lens hardware | Use native 3x–5x zoom stops | Distant subjects, architecture, wildlife | Galaxy S25 Ultra, Xiaomi 15 Ultra |
| Digital Zoom | Crops and enlarges image digitally | Avoid when possible, crop from RAW instead | Only when optical zoom is insufficient | All smartphones |
| AI Stabilization | Reduces blur in low-light, long exposures | Automatic in night/low-light modes | Handheld night scenes, cityscapes | iPhone 16 Pro Max, Galaxy S25 Ultra |
| Multi-Frame Stacking | Reduces noise, enhances detail | Automatic in Night/Portrait modes | Low-light, astrophotography, portraits | Pixel 9 Pro, Galaxy S25 Ultra |
Editing, Sharing, and Troubleshooting: From Good Photos to Great Results

Editing, Sharing, and Troubleshooting: From Good Photos to Great Results
Smartphone cameras might be more powerful than ever, but even the best—iPhone 16 Pro Max, Galaxy S25 Ultra, Pixel 9 Pro—rarely deliver perfect images straight out of the camera. Exposure, color, and sharpness can all fall short, especially in mixed lighting or challenging conditions. The real magic often happens after you tap the shutter: editing. Thanks to modern mobile apps, anyone can take their images from “decent” to “outstanding” in just a few minutes, without ever leaving their phone.
This section breaks down a practical, real-world editing workflow using proven mobile apps. You’ll learn how to make essential adjustments, avoid common pitfalls, and troubleshoot issues unique to smartphone photos. We’ll also cover best practices for exporting, sharing, and backing up your images—plus when it’s worth considering accessories or a hybrid mobile-to-desktop workflow.
Start With the Right Tools and File Types
If you’re serious about editing, start by shooting in RAW—or ProRAW/DNG, depending on your device. RAW files store far more color and exposure data than JPEGs, giving you much greater latitude for recovering highlights, lifting shadows, and correcting color. For reference: RAW files are typically 2–3x larger than JPEGs, but the flexibility is worth it if you want pro-level results.
Top apps like Snapseed (free, Android/iOS), Lightroom Mobile, and VSCO all support non-destructive RAW editing—meaning your original file is never overwritten, and you can undo or tweak edits at any time. Beginners often find Movavi Photo Editor’s straightforward interface less intimidating, while Lightroom Mobile stands out for advanced controls like selective masking and batch edits. For most users, Snapseed or Lightroom Mobile will handle 90% of your needs; if you’re curious, try both and see which workflow “clicks.”
A Practical Editing Workflow—Step by Step
1. Geometry and Crop
Start by straightening horizons and correcting distortion—crucial for cityscapes, architecture, or anything with strong lines. Cropping early helps you define your composition and prevents wasted time editing parts of the image you’ll discard.
2. Exposure and White Balance
Adjust exposure first: recover highlights, lift muddy shadows, and set the overall brightness. RAW files give you far more headroom, but even JPEGs benefit from careful tweaking. Next, correct white balance. Auto white balance often misses the mark in mixed lighting (e.g., indoor scenes with window light), so use manual sliders or an eyedropper tool to eliminate unwanted color casts.
3. Color and Contrast
Boost vibrance or saturation with restraint—over-processing is the quickest way to make a photo look “fake.” For nuanced corrections, adjust individual color channels (both Lightroom and Snapseed support this). Fine-tune contrast and “structure” (micro-contrast) to add punch without destroying natural detail.
4. Sharpness and Noise Reduction
Low-light smartphone photos are notorious for noise and slight softness. Use sharpening and noise reduction tools sparingly: too much noise reduction smears detail, while aggressive sharpening introduces ugly halos. Snapseed and Lightroom both let you control these parameters independently.
5. Local Adjustments
Modern mobile editors let you dodge and burn (lighten/darken specific regions), mask areas, or brush on selective edits. This is invaluable for fixing overexposed skies, brightening faces, or toning down saturated backgrounds—especially in tricky lighting. For example, you can use a brush to desaturate overly orange skin tones or add structure to a dull sky.
6. Finishing Touches
Add a subtle vignette or film-like grain if it fits your style, but avoid heavy filters that obscure the subject or reality—unless you’re intentionally aiming for an artistic effect. A good rule: step away from your edit for a few minutes, then revisit with fresh eyes before exporting.
Before/After Example:
Imagine a daylight portrait taken under harsh sun: faces are shadowed, backgrounds look washed out. By lifting shadows, cooling the white balance (to counteract yellow sunlight), and adding a touch of structure, you can create a much more flattering image—skin tones look natural, background details pop, and the subject stands out. Before-and-after sliders (like those in MERIDIQ’s free tool) are excellent for visualizing your impact and learning restraint.
Troubleshooting: Fixing the Most Common Mobile Photo Problems
Noise in Low Light
Smartphone sensors are tiny compared to cameras like the APS-C or full-frame sensors in dedicated gear, so noise is inevitable in dim conditions. Shooting in RAW helps, but even then, don’t expect miracles. Use AI-powered denoising tools in Google Photos or Lightroom Mobile, but stop when the image starts looking “plastic.” Sometimes, a bit of grain is better than a blurry, over-smoothed photo.
Motion Blur
Fast-moving subjects or shaky hands in low light? Even with Optical Image Stabilization (OIS), phones struggle here. AI tools like Remini can “unblur” images, but results are best on mild blur—and can introduce artifacts. The best fix remains prevention: stabilize your phone (use a wall, tripod, or even your elbows), and avoid Night Mode with moving subjects, as multi-second exposures are the main culprit.
Over-Processing
It’s tempting to max out every slider, but restraint pays off. As PhotoTipsGuy puts it, “Enhance photos without compromising authenticity or pushing edits to the point of diminishing returns.” My advice: if your edits draw more attention than the subject, you’ve gone too far. Set a time limit per photo (five minutes is plenty), and always compare your final edit to the untouched original.
Color Accuracy
Smartphones, especially those with OLED screens, often display oversaturated colors that don’t translate well to other devices or print. To improve accuracy:
- Shoot and edit in RAW for maximum color data.
- Export in sRGB color space.
- Review edits on multiple devices (phone, tablet, laptop) before sharing.
- Avoid editing in rooms with strong color casts (like under orange bulbs).
Exporting at Full Quality, Sharing, and Backups
Export Settings
For Instagram and most social media, export verticals at 1080×1350 pixels, squares at 1080×1080, and use JPEG at 80–90% quality. This balances sharpness with manageable file sizes and avoids platform compression artifacts. For printing or desktop viewing, keep images at least 3000 pixels on the long side, and consider TIFF or maximum-quality JPEG.
Sharing on Social Media
Stick to each platform’s recommended sizes—Buffer’s 2025 guide is a good reference (e.g., Instagram verticals at 4:5, Facebook at 1080×1350)—to avoid awkward crops or extra compression. Statistically, images featuring faces and natural backgrounds get more engagement, and blue-dominant photos tend to perform better on Instagram.
Safe Backup Strategies
Losing photos is still far too common, especially with device theft or accidental deletion. Follow the “rule of three”: keep three copies, in two formats, with one copy off-site (such as cloud storage). Google Photos, Dropbox, and OneDrive all offer automatic photo backup—just enable uploads and let them run. For RAW files or more control, SmugMug, Backblaze, or NordLocker offer pro-level security and support. Locally, transfer important photos to an external SSD or hard drive, and if you’re on Android, wireless backup via FTP/SFTP apps is quick and reliable.
Leveling Up: Continuous Improvement and Hybrid Workflows
The best editing is a skill you develop by shooting, experimenting, and reviewing your own work. Rather than chasing every new app or preset, focus on mastering one or two robust editing tools and refining your workflow. As your ambition grows, you may hit the limits of mobile tools—batch processing, advanced retouching, or color grading are still faster on desktop editors like Lightroom Classic or Affinity Photo. Hybrid workflows—shooting on your phone, exporting RAWs to a tablet or computer—can deliver results that genuinely rival mid-range mirrorless cameras.
If you repeatedly hit hardware or software walls, consider an upgrade: a phone with a better sensor and lens, a clip-on lens for ultra-wide or macro shots, or a portable LED light for improved night photography. But as real-world testing shows, thoughtful editing, disciplined backup habits, and a streamlined workflow will get you 90% of the way—regardless of the phone in your pocket.
Bottom line:
Editing is where smartphone photography transforms from quick snapshots to memorable images. Equip yourself with the right apps, a sensible workflow, and a solid backup plan, and you’ll consistently turn good images into great ones—ready to share, print, or simply enjoy.
| Step | Action | Purpose/Tips | Recommended Tools/Features |
|---|---|---|---|
| 1. Geometry and Crop | Straighten horizons, correct distortion, crop image | Define composition early, avoid editing discarded areas | Crop, Rotate, Perspective tools in Snapseed, Lightroom Mobile |
| 2. Exposure and White Balance | Adjust exposure, recover highlights/shadows, correct white balance | Set brightness, eliminate color casts | Exposure, Highlights/Shadows, White Balance sliders/eyedropper |
| 3. Color and Contrast | Boost vibrance/saturation, adjust individual color channels, fine-tune contrast | Enhance color naturally, avoid over-processing | Color Mixer/HSL, Contrast, Structure tools |
| 4. Sharpness and Noise Reduction | Sharpen image, reduce noise | Use sparingly to avoid halos or smearing | Sharpen, Noise Reduction sliders |
| 5. Local Adjustments | Dodge/burn, mask areas, selective edits | Fix specific issues (e.g., brighten faces, tone down backgrounds) | Brush, Masking, Selective Edit tools |
| 6. Finishing Touches | Add vignette, grain, or subtle effects | Apply minimal finishing for style, avoid heavy filters | Vignette, Grain, Presets |

UltraGlass UNBREAK TOP 9H+ Armor for iPhone 17 Pro Max Screen Protector [NO.1 Military Grade Shatterproof] Screen Protector 17 Pro Max Tempered Glass 17 ProMax, Longest Durable, Full Coverage, 2 Pack
$28.98 (as of October 2, 2025 06:34 GMT +00:00 - More infoProduct prices and availability are accurate as of the date/time indicated and are subject to change. Any price and availability information displayed on [relevant Amazon Site(s), as applicable] at the time of purchase will apply to the purchase of this product.)
FireNova Magnetic for iPhone 17 Pro Case, Compatible with MagSafe, [Integrated Silicone Camera Control Button] [Camera Protection] Anti-Scratch Microfiber Lining Phone Case, 6.3", Calke Green
$12.98 (as of October 2, 2025 06:34 GMT +00:00 - More infoProduct prices and availability are accurate as of the date/time indicated and are subject to change. Any price and availability information displayed on [relevant Amazon Site(s), as applicable] at the time of purchase will apply to the purchase of this product.)
ESR for iPhone 11 Phone Case, Compatible with MagSafe, Shockproof Military-Grade Protection, Magnetic Phone Case for iPhone 11, Classic Hybrid Case (HaloLock), Clear
$7.99 (as of October 2, 2025 06:34 GMT +00:00 - More infoProduct prices and availability are accurate as of the date/time indicated and are subject to change. Any price and availability information displayed on [relevant Amazon Site(s), as applicable] at the time of purchase will apply to the purchase of this product.)
Apple iPhone 17 Pro Max Clear Case with MagSafe MagSafe and Camera Control: Lightweight Phone Case, Wireless Charging Compatible, Smooth Glossy Finish
$43.99 (as of October 2, 2025 06:34 GMT +00:00 - More infoProduct prices and availability are accurate as of the date/time indicated and are subject to change. Any price and availability information displayed on [relevant Amazon Site(s), as applicable] at the time of purchase will apply to the purchase of this product.)