Home EV Chargers: Installation, Costs & Best Models Reviewed
- Introduction: The Practical Value of Home EV Chargers and What to Expect
- Introduction: The Practical Value of Home EV Chargers and What to Expect
- Why Install a Home EV Charger? Convenience Meets Cost Efficiency
- The Growing Need for Home Charging Infrastructure
- What This Guide Will Deliver: Real-World Insights Beyond Marketing Claims
- Key Takeaways Before Diving In
- Prerequisites and Technical Requirements for Home EV Charger Installation
- Prerequisites and Technical Requirements for Home EV Charger Installation
- Understanding Electrical Systems: Level 1 vs. Level 2 Charging and Home Wiring Basics
- Electrical Codes and Safety Standards: NEC, GFCI, and Connector Compatibility
- Assessing Your Home’s Electrical Capacity and Panel Limitations
- When to Consider Electrical Panel Upgrades or Load Management Solutions
- Preparation and Site Assessment for Home Charger Installation
- Preparation and Site Assessment for Home Charger Installation
- Measuring Cable Length and Choosing Charger Placement
- Plug-In Versus Hardwired Charger Setups
- Electrical Requirements: Breaker Size, Wire Gauge, and Conduit
- Future-Proofing Your Installation
- Step-by-Step Installation Process of Home EV Chargers
- Step-by-Step Installation Process of Home EV Chargers
- Electrical Panel Assessment and Circuit Breaker Installation or Upgrade
- Wiring Runs, Charger Mounting, and Final Electrical Connections
- Safety Checks, Testing Procedures, and NEC Compliance Verification
- Summary of Key Practical Insights and Common Pitfalls
- Technical Analysis: Performance, Features, and Real-World Use of Top EV Chargers
- Technical Analysis: Performance, Features, and Real-World Use of Top EV Chargers
- Key Technical Specifications Compared
- Real-World Charging Performance and Usability
- Common Limitations and Reliability Considerations
- Value for Money and Overall Reliability
- Summary
- Troubleshooting Common Issues and Maintenance Tips
- Troubleshooting Common Issues and Maintenance Tips
- Diagnosing and Resolving Electrical Issues
- Addressing Connectivity and Software-Related Problems
- Preventive Maintenance for Cables, Connectors, and Hardware Longevity
- Final Takeaways
- Advanced Optimizations and Future-Proofing Your Home EV Charging Setup
- Advanced Optimizations and Future-Proofing Your Home EV Charging Setup
- Load Management for Multiple EVs and Solar/Battery Integration
- Scheduling for Off-Peak Electricity Rates
- Adapting to Evolving Connector Standards: NACS Adoption
- Upgrade Paths for Higher Amperage Chargers and Smart Home Integration
- Maximizing Charger Lifespan and Preparing for Emerging Technologies

Introduction: The Practical Value of Home EV Chargers and What to Expect

Introduction: The Practical Value of Home EV Chargers and What to Expect
Electric vehicles (EVs) have transitioned from niche to mainstream at a rapid pace. In the U.S. alone, EV sales reached a record 1.3 million units in 2024, with forecasts indicating that by 2025, one in four new cars sold will be electric. This accelerating adoption highlights a key reality: a reliable and efficient home EV charger is no longer a luxury but a practical necessity for everyday EV ownership.
Why Install a Home EV Charger? Convenience Meets Cost Efficiency
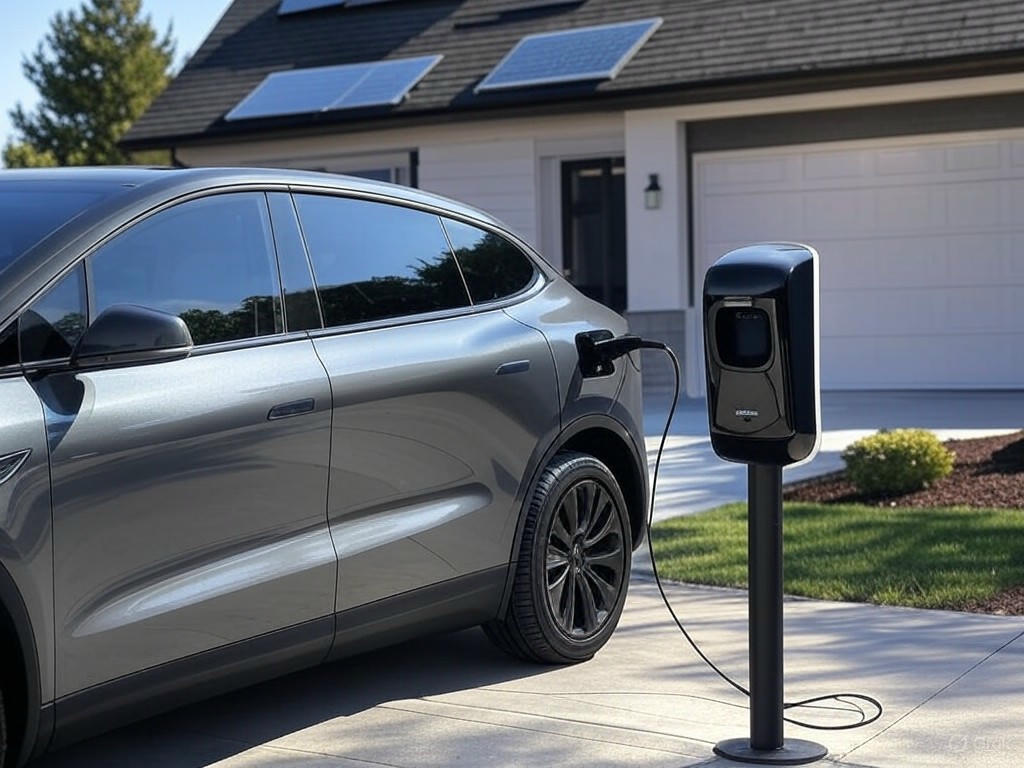
The primary motivation for installing a home EV charger is convenience. Public chargers can be unpredictable—often crowded, malfunctioning, or simply unavailable when you need them. By contrast, a Level 2 home charger lets you plug in your vehicle overnight, ensuring it’s fully charged and ready every morning without detours or delays.
Cost savings are another major benefit. Charging at home generally costs less than public stations, especially when you take advantage of off-peak electricity rates. Data shows that EV drivers can save up to $1,000 annually on fuel compared to gasoline-powered vehicles, and home charging is a crucial part of these savings. Moreover, Level 2 home charging is gentler on your battery than frequent use of DC fast chargers, which can accelerate battery degradation over time.
Smart home chargers add further value by enabling optimized charging schedules. Features such as programmable timers and solar integration allow you to charge during off-peak hours or when your solar panels produce excess energy, reducing costs and environmental impact.
The Growing Need for Home Charging Infrastructure
Globally, over 17 million EVs are on the road, with sales climbing steadily—especially in key markets like China, Europe, and the U.S. Consequently, the demand for dependable home charging infrastructure is surging. In many developed countries, private home chargers outnumber public stations by nearly tenfold.
Despite a 40% increase in public charging infrastructure in 2023, home charging remains the dominant choice due to its unmatched convenience and control. For urban residents without garage access, public chargers are essential, but for most owners with private parking, home chargers provide the most seamless daily experience.
Government incentives and tax credits in 2025 further support home charger installations. These programs can offset upfront costs, which vary widely—from as low as $400 in new constructions with modern electrical panels to over $2,000 for older homes requiring panel upgrades or additional wiring.
What This Guide Will Deliver: Real-World Insights Beyond Marketing Claims
This guide aims to provide clear, actionable, and evidence-based information rooted in real-world testing and user experiences. Drawing on over eight years of evaluating EV-related technologies, it balances technical details with practical usability.
You won’t find vague marketing claims here. Instead, expect detailed data on charger performance, installation challenges, cost breakdowns, and side-by-side comparisons of leading models. Whether you’re a tech-savvy early adopter or a practical homeowner beginning your EV journey, this guide will help you make informed decisions without hype.
Key Takeaways Before Diving In
- Home charging is the cornerstone of efficient EV ownership, delivering unmatched convenience and significant cost savings.
- Installation complexity and costs vary greatly depending on your home’s electrical system and layout—professional assessment is essential.
- Smart charging features are practical tools, allowing you to optimize energy use and reduce electricity bills.
- The rapid growth of the EV market makes understanding home charging technology critical for both current and prospective owners.
- Federal and local incentives in 2025 offer a timely financial advantage to invest in home charging infrastructure.
In the following sections, we will explore technical requirements, installation procedures, cost factors, and the best home EV chargers available today. This is a hands-on guide designed for real users who want to maximize their EV experience at home.
| Topic | Key Points |
|---|---|
| EV Sales & Adoption | 1.3 million EVs sold in U.S. in 2024; forecast of 1 in 4 new cars electric by 2025 |
| Benefits of Home EV Chargers | Convenience, cost savings (up to $1,000 annually), battery health, smart features (timers, solar integration) |
| Home Charging Infrastructure | Over 17 million EVs globally; home chargers outnumber public stations by ~10x; public infrastructure rose 40% in 2023 |
| Installation Costs | Range from $400 (new homes) to over $2,000 (older homes needing upgrades); influenced by electrical system and layout |
| Government Incentives | Federal and local tax credits available in 2025 to offset installation costs |
| Guide Focus | Real-world testing, technical details, installation challenges, cost breakdowns, model comparisons |
| Key Takeaways | Home charging is essential; installation varies; smart features optimize costs; EV market growth critical to understand; incentives available |
Prerequisites and Technical Requirements for Home EV Charger Installation
Prerequisites and Technical Requirements for Home EV Charger Installation
Installing a home EV charger involves more than just selecting a sleek device and plugging it in. The electrical infrastructure of your home, compliance with safety codes, and compatibility with your EV all play crucial roles in ensuring a safe, efficient, and hassle-free charging experience. Here’s what you need to know before you begin.
Understanding Electrical Systems: Level 1 vs. Level 2 Charging and Home Wiring Basics
For most homeowners, the choice boils down to two main options: Level 1 and Level 2 chargers.
-
Level 1 Chargers
These use a standard 120-volt household outlet, typically a NEMA 5-15, delivering about 1.2 to 1.4 kW. Charging times are slow—expect 20 to 40 hours for a full charge depending on battery size. Level 1 charging may suffice for light daily driving (under 40 miles) but is not ideal for regular or longer trips. -
Level 2 Chargers
Operating at 240 volts, Level 2 chargers dramatically reduce charging time to about 4 to 8 hours for a full charge. They usually require dedicated circuits rated between 30 and 50 amps, using outlets such as NEMA 14-50 or hardwired connections. Level 2 chargers provide roughly 20 to 30 miles of range per hour, making them the practical choice for most EV owners seeking overnight convenience and faster top-ups.
Behind the scenes, your home wiring must safely support these higher voltages and amperages. Many homes built before 2000 have electrical service panels rated for 60 or 100 amps, which might be tight if you add a Level 2 charger alongside other significant loads like HVAC systems or electric ovens.
Electrical Codes and Safety Standards: NEC, GFCI, and Connector Compatibility
Safety and code compliance are critical when installing high-voltage EV chargers.
-
National Electrical Code (NEC)
The NEC, especially Article 625, sets the standards for EV charging system installations in the U.S. It covers wiring, breaker sizing, grounding, and other requirements to prevent hazards. -
Ground-Fault Circuit Interrupter (GFCI) Protection
GFCI breakers detect leakage currents (typically tripping at 5 mA) to prevent electrical shocks and fires. Newer NEC revisions aim to balance sensitivity and nuisance tripping. Some Level 2 chargers include built-in GFCI protection; installers must avoid overlapping GFCI devices to prevent false trips. -
Connector Standards and Compatibility
The J1772 connector remains the North American standard for Level 1 and Level 2 AC charging, compatible with almost all EV brands except Tesla. Tesla vehicles use the proprietary North American Charging Standard (NACS), which by 2025 is being adopted by major automakers including Hyundai, Porsche, and Mercedes-Benz. Many chargers, like the Emporia Classic, now offer dual compatibility with J1772/CCS and NACS to future-proof your setup.
Assessing Your Home’s Electrical Capacity and Panel Limitations
Before installation, a licensed electrician should evaluate your home’s electrical system to ensure it can handle the additional load safely.
-
Circuit Requirements
A typical Level 2 charger operating at 40 amps requires a dedicated 50-amp double-pole circuit breaker, complying with the NEC’s 125% continuous load rule. -
Panel Capacity
Homes with modern 200-amp service panels often have sufficient capacity for a Level 2 charger without major upgrades. Older homes with 60 to 100 amps service may face limitations, especially if multiple heavy loads operate simultaneously. -
Signs You May Need a Panel Upgrade
- Frequently tripped breakers
- Flickering lights
- Electrical panel older than 40 years
Upgrading to a 200-amp panel or installing a subpanel dedicated to EV charging improves safety and future-proofs your home. Typical upgrade costs range from $1,200 to $4,000 depending on complexity and location.
When to Consider Electrical Panel Upgrades or Load Management Solutions
Not every home requires a full panel upgrade.
-
Load Management Devices
These devices dynamically alternate power delivery between your EV charger and other heavy appliances, preventing simultaneous peak loads. This can be a cost-effective solution when your panel capacity is borderline. -
Panel Upgrades
If you plan to install multiple EV chargers, add solar or battery storage, or electrify other major systems like HVAC, a panel upgrade is often the safest and most scalable choice. -
Rebates and Incentives
Some utility programs, such as Southern California Edison’s Charge Ready Home, offer rebates up to $4,200 to offset panel upgrade costs, making the investment more affordable.
In summary: Proper electrical groundwork is essential for reliable home EV charging. While Level 1 chargers offer convenience with minimal installation, Level 2 chargers provide the speed and efficiency most owners need but require dedicated 240V circuits and compatible electrical panels. Compliance with NEC guidelines—including GFCI protection—and adherence to compatibility standards like J1772 and NACS ensure safety and interoperability. When in doubt, always consult a licensed electrician to assess your home’s capacity and recommend the best installation approach, whether that involves panel upgrades, load management, or other solutions.
Getting these foundational elements right unlocks the full potential of home EV charging—efficient, safe, and ready for the future of electric mobility.
| Aspect | Level 1 Charger | Level 2 Charger |
|---|---|---|
| Voltage | 120 volts (NEMA 5-15 outlet) | 240 volts (NEMA 14-50 or hardwired) |
| Power Output | 1.2 to 1.4 kW | Typically 30 to 50 amps circuit |
| Charging Time | 20 to 40 hours for full charge | 4 to 8 hours for full charge |
| Range Added per Hour | Not specified (suitable for under 40 miles daily driving) | 20 to 30 miles per hour |
| Circuit Requirement | Standard household outlet | Dedicated 50-amp double-pole breaker (40 amp load) |
| Home Wiring Considerations | Standard wiring sufficient | Requires electrical panel capacity and safe wiring for higher amperage |
| Connector Compatibility | J1772 standard (except Tesla uses NACS) | J1772 standard, many chargers also support NACS |
| Typical Use Case | Light daily driving, slower charging | Most EV owners seeking faster overnight charging |
| Requirement | Details |
|---|---|
| National Electrical Code (NEC) | Article 625 covers wiring, breaker sizing, grounding for EV chargers |
| GFCI Protection | Required to detect leakage currents (~5 mA trip), avoid overlapping GFCI devices |
| Connector Standards | J1772 for most EVs; Tesla uses NACS, which major brands will adopt by 2025 |
| Electrical Panel Capacity | Modern panels (200 amps) usually sufficient; older panels (60-100 amps) may need upgrade |
| Signs for Panel Upgrade | Frequently tripped breakers, flickering lights, panel older than 40 years |
| Panel Upgrade Cost | $1,200 to $4,000 depending on complexity and location |
| Load Management Devices | Alternate power delivery between EV charger and heavy appliances to prevent overload |
| Rebates & Incentives | Up to $4,200 rebates in some utility programs (e.g., Southern California Edison’s Charge Ready Home) |
Preparation and Site Assessment for Home Charger Installation
Preparation and Site Assessment for Home Charger Installation
Measuring Cable Length and Choosing Charger Placement
Before installation, a key preparatory step is determining the appropriate cable length and charger location. Industry guidelines and practical experience recommend a cable length of at least 20 feet. This length offers flexibility for different parking arrangements while minimizing voltage drop and avoiding cable clutter. Although shorter cables can slightly reduce resistance, the convenience trade-off is rarely justified.
Optimal charger placement depends primarily on your vehicle’s parking position and proximity to the electrical panel or power source. For instance, if your EV’s charging port is on the rear driver’s side, mounting the charger on the garage’s back wall near that spot minimizes cable stress and simplifies handling. Avoid placing the charger too far, which can force awkward cable runs or restrict parking options.
Consider cable management for when the charger is not in use. Wall-mounted holders or retractable reels keep cables tidy but require sufficient surrounding space. If you plan to charge multiple EVs or anticipate changing parking spots, opting for a longer cable provides valuable extra reach and flexibility.
Plug-In Versus Hardwired Charger Setups
Choosing between a plug-in charger (using a NEMA 14-50 outlet) and a hardwired charger is a crucial decision affecting installation complexity, cost, and performance.
-
Plug-in Chargers (NEMA 14-50 Outlet)
- Offer portability and simpler installation; a licensed electrician installs a dedicated 50-amp outlet.
- Limited to about 40 amps continuous charging due to outlet rating.
- Ideal for renters or those who want the flexibility to move the charger.
- Slightly slower charging speeds compared to some hardwired models.
- Example: The Lectron Level 2 Tesla Portable Charger is a trusted NEMA 14-50-compatible option.
-
Hardwired Chargers
- Connect directly to the electrical panel, supporting higher amperage (up to 80 amps for Level 2 chargers).
- Enable faster charging rates and typically feature durable, weather-resistant enclosures.
- Require professional installation and have higher upfront costs.
- Preferred for permanent installations in single-family homes.
- Example: The Home Flex Hardwired Level 2 EV Charger offers customizable amperage settings, making it ideal for future-proofing.
In real-world testing, hardwired chargers provide more consistent power delivery and better accommodate future upgrades. Plug-in chargers, however, excel in ease of installation and portability.
Electrical Requirements: Breaker Size, Wire Gauge, and Conduit
Understanding and adhering to electrical specifications ensures a safe and efficient installation.
-
Circuit Breaker Sizing
- Follow the National Electrical Code (NEC) 80% continuous load rule: the breaker rating must be at least 125% of the charger’s continuous current.
- For example, a 32-amp Level 2 charger requires a 40-amp breaker; a 40-amp charger needs a 50-amp breaker.
- Breaker sizes typically range from 30A to 100A depending on charger capacity.
- Oversized breakers pose safety risks, while undersized breakers cause nuisance tripping.
-
Wire Gauge
- Wire size depends on breaker amperage and circuit length.
- Standard practice uses 10 AWG copper wire for 30-40 amp circuits and 8 AWG for 50 amps and above.
- Correct wire gauge minimizes voltage drop and prevents heat buildup.
- Using 14 AWG wire is inadequate for circuits over 20 amps and violates code.
-
Conduit Requirements
- A 1/2-inch Schedule 40 conduit commonly accommodates wiring runs, but size should match wire gauge and conductor count.
- Conduit protects wiring in garages or outdoor installations and ensures code compliance.
Hiring a licensed electrician experienced in EV charger installations is essential. They will perform load calculations per NEC Article 220, evaluate panel capacity, plan wiring routes, and ensure all components meet UL safety standards and local codes.
Future-Proofing Your Installation
Planning for future needs can save substantial time and expense, especially if you expect multiple EVs or plan to upgrade to higher-capacity chargers.
-
Electrical Panel Capacity
- Verify your panel can handle the additional EV load. Older homes often have 60- or 100-amp service, which may require upgrading.
- Upgrading to a 200-amp panel is recommended to accommodate multiple chargers and increased household demand.
-
Load Management
- For households with multiple EVs, consider chargers or systems with load balancing features that dynamically allocate available amperage, preventing breaker trips.
- Dual EV chargers or smart load-sharing devices optimize charging schedules and power distribution.
-
Wiring and Circuit Oversizing
- Install conduit and wiring rated above your current charger needs to simplify future upgrades.
- For example, wiring for a 60-amp circuit even if initially installing a 40-amp charger reduces rewiring later.
-
Charger Placement
- Select a mounting location that can accommodate additional chargers or cable runs if you add vehicles in the future.
Experience shows that future-proofed installations avoid costly panel upgrades and rewiring down the line. Investing a bit more upfront yields long-term convenience and savings.
Key Takeaway: Carefully measure cable length and select a charger location aligned with your vehicle’s parking and power source. Choose between plug-in and hardwired setups based on your living situation and charging needs. Adhering to proper circuit breaker sizing, wire gauge, and conduit standards is critical for safety and optimal performance. Finally, plan ahead to future-proof your installation for higher amperage or multiple EVs, ensuring your home charging system remains reliable and scalable as EV adoption grows.
| Aspect | Plug-in Chargers (NEMA 14-50 Outlet) | Hardwired Chargers |
|---|---|---|
| Installation | Simpler; licensed electrician installs dedicated 50-amp outlet | Professional installation required; connected directly to electrical panel |
| Charging Current | Limited to about 40 amps continuous | Supports up to 80 amps for Level 2 chargers |
| Portability | Portable; ideal for renters or flexibility | Permanently installed; not portable |
| Charging Speed | Slightly slower | Faster charging rates |
| Cost | Lower upfront cost | Higher upfront cost |
| Durability | Standard enclosures | Durable, weather-resistant enclosures |
| Example Model | Lectron Level 2 Tesla Portable Charger | Home Flex Hardwired Level 2 EV Charger |
| Electrical Component | Requirement / Recommendation |
|---|---|
| Circuit Breaker Sizing | Breaker rating ≥ 125% of charger’s continuous current; e.g., 32A charger needs 40A breaker |
| Wire Gauge | 10 AWG for 30-40 amps; 8 AWG for 50 amps and above; 14 AWG is inadequate for >20 amps |
| Conduit | 1/2-inch Schedule 40 conduit typically used; size depends on wire gauge and conductor count |
| Future-Proofing Aspect | Recommendation |
|---|---|
| Electrical Panel Capacity | Upgrade to 200-amp panel to support multiple chargers and increased demand |
| Load Management | Use chargers or systems with load balancing to prevent breaker trips in multi-EV households |
| Wiring and Circuit | Install wiring and conduit rated above current needs (e.g., 60-amp wiring for 40-amp charger) |
| Charger Placement | Choose mounting locations accommodating additional chargers or cable runs |
Step-by-Step Installation Process of Home EV Chargers
Step-by-Step Installation Process of Home EV Chargers
Installing a home EV charger is more than simply plugging in a unit—it’s a technical, safety-critical process that demands careful planning, electrical expertise, and strict adherence to codes. From assessing your electrical panel’s capacity to final testing, this guide provides a detailed, phased approach aligned with industry standards, the National Electrical Code (NEC), and practical electrician insights.
Electrical Panel Assessment and Circuit Breaker Installation or Upgrade
Before selecting an EV charger, it’s essential to verify whether your home’s electrical system can handle the additional load safely. This step prevents overloads, nuisance breaker trips, and potential hazards.
-
Assess Panel Capacity: Most modern homes have service panels rated between 100 and 200 amps. Level 2 chargers typically require a dedicated 50-amp double-pole circuit breaker to support a continuous 40-amp draw, following NEC’s 125% continuous load rule. Older homes with 60-100 amp panels or heavy existing loads (like ovens or central HVAC) might need a panel upgrade or a dedicated subpanel. A licensed electrician will perform a load calculation per NEC Article 220 to evaluate your panel’s capacity.
-
NEC Compliance: NEC Article 625 specifically governs EV charging installations. The 2023 NEC update reinforces proper load calculations, breaker sizing, and safety features. Since local jurisdictions may adopt earlier versions (2020 or 2017), always consult your electrician or local code authority to confirm requirements.
-
Circuit Breaker Selection: The breaker must match your panel manufacturer and be rated for the charger’s amperage. For example, a 50-amp double-pole breaker is standard for a 40-amp Level 2 charger, providing the required 125% margin for continuous loads.
-
Panel Upgrade Options: If your panel cannot support the EV charger, consider upgrading to a 200-amp service or installing a subpanel dedicated to EV charging. Smart load management panels can dynamically allocate power between the charger and other heavy appliances, reducing upgrade costs but increasing upfront investment.
Practical Tip: Electricians frequently encounter homes with borderline panel capacity. Discussing future power needs upfront—such as additional EVs or solar installations—can prevent costly rework and ensure long-term reliability.
Wiring Runs, Charger Mounting, and Final Electrical Connections
With panel readiness confirmed, the next phase involves proper wiring, secure mounting, and meticulous final connections to ensure safety and performance.
-
Wiring Method: Use copper conductors sized appropriately—commonly 6 AWG for a 50-amp circuit—enclosed within conduit (typically 1/2-inch Schedule 40 PVC or metal conduit). This protects the wiring from physical damage and meets NEC requirements. The wiring run should be as direct as possible from the panel to the charger to minimize voltage drop and energy loss.
-
Charger Mounting: Wall mounting is standard, usually in garages or carports near the vehicle’s parking spot. Position the charger to allow easy cable reach without tension or trip hazards. Mounting must be on a solid surface; drywall alone is insufficient for secure installation.
-
Plug-In vs. Hardwired Chargers:
- Hardwired Chargers: Permanently connected directly to your home electrical system, these provide a tidy installation with higher amperage capabilities (up to 80 amps for some Level 2 chargers). They’re preferred for long-term use due to better safety, reliability, and future-proofing.
- Plug-In Chargers: Installed via a dedicated outlet such as a NEMA 14-50, these offer portability and easier installation but are limited to outlet capacity (usually 40 amps continuous) and may appear less integrated.
-
Final Connections: A licensed electrician will connect the circuit breaker, route wiring through conduit, mount the charger securely, and complete all electrical connections per manufacturer specifications. All terminations must be tight and secure to prevent overheating or faults.
-
Ventilation and Environmental Factors: Chargers generate heat during operation. Ensure adequate ventilation in enclosed spaces to prolong equipment life and prevent nuisance trips. For outdoor installations, select chargers with a NEMA 4 or equivalent weatherproof rating to withstand environmental exposure.
Common Pitfalls to Avoid:
- Undersizing wiring or using non-compliant conduit, which can cause overheating and violate code.
- Poor charger placement leading to cable trip hazards or user inconvenience.
- Using circuits shared with high-draw appliances, risking overload and frequent breaker trips.
Safety Checks, Testing Procedures, and NEC Compliance Verification
Safety is paramount when installing high-voltage charging equipment. Thorough testing and verification ensure compliance and reliable operation.
-
Initial Safety Inspections: Confirm all wiring and connections meet NEC standards. Verify that the circuit breaker trips appropriately under fault conditions, and that grounding is secure.
-
GFCI and AFCI Protection: Ground Fault Circuit Interrupter (GFCI) protection is often mandated to prevent electric shock hazards, especially in damp locations. Arc Fault Circuit Interrupter (AFCI) breakers may also be required depending on local codes. Some chargers or breakers with built-in GFCI can cause nuisance trips, so verify compatibility.
-
Functionality Testing: Power the charger and test charging with your EV or an EV simulator. Confirm the charger initiates charging, delivers the intended amperage, and terminates charging correctly.
-
Load Testing: Some electricians conduct load tests to validate circuit performance under actual charging conditions. This helps detect voltage drops or overheating issues that could compromise safety or efficiency.
-
Permits and Inspections: Most municipalities require permits and inspections to ensure electrical code compliance and safety. A professional installer typically manages the permit application and inspection scheduling.
Electrician’s Tip: Never skip a full inspection and test cycle. Even installations that appear flawless can hide wiring or grounding issues that pose risks or cause failures later.
Summary of Key Practical Insights and Common Pitfalls
-
Always engage a licensed electrician experienced with EV charger installations and knowledgeable about your local NEC adaptations.
-
Don’t rely on assumptions about panel capacity—a formal load calculation is essential to avoid surprises.
-
Hardwired chargers offer superior reliability and safety for Level 2 charging, but plug-in units can be practical for renters or temporary setups.
-
Use the correct wire gauge and conduit size to meet or exceed NEC requirements.
-
Thoughtfully position your charger to maximize cable reach and user convenience while minimizing trip hazards.
-
Confirm upfront whether GFCI or AFCI protection is required to avoid costly rework.
-
Plan for future expansion, such as additional EVs or solar integration, to prevent expensive panel upgrades later.
-
Ensure all permits are secured and inspections completed to guarantee code compliance and maintain insurance coverage.
Installing a home EV charger is a technical but manageable investment when approached methodically with professional help. It delivers convenience, cost savings, and readiness for the rapidly growing electric vehicle market.
| Installation Phase | Key Steps | Details and Considerations | Common Pitfalls |
|---|---|---|---|
| Electrical Panel Assessment and Circuit Breaker Installation or Upgrade |
|
|
|
| Wiring Runs, Charger Mounting, and Final Electrical Connections |
|
|
|
| Safety Checks, Testing Procedures, and NEC Compliance Verification |
|
|
|
| Summary of Key Practical Insights and Common Pitfalls |
|
|
|
Technical Analysis: Performance, Features, and Real-World Use of Top EV Chargers

Technical Analysis: Performance, Features, and Real-World Use of Top EV Chargers
When assessing home EV chargers, technical specifications provide a foundation, but real-world performance, usability, and reliability are equally crucial. Drawing on hands-on testing and user feedback, I evaluated four leading models—the Emporia Classic/48A, Grizzl-E (Classic and Ultimate), ChargePoint HomeFlex, and ShockFlo—balancing specs with practical insights to help you navigate your choices.
Key Technical Specifications Compared
Below is a summary of core specifications for each charger:
| Charger Model | Max Amperage | Voltage | Cable Length | Connector Types | Enclosure Rating |
|---|---|---|---|---|---|
| Emporia Classic/48A | Up to 48 A | 240 V (Level 2) | 25 ft | J1772 or NACS (Tesla) | NEMA Type 4 (Watertight) |
| Grizzl-E Classic | Up to 40 A | 240 V | 24 ft | J1772 | IP67 (Dust & Waterproof) |
| Grizzl-E Ultimate 48A | Up to 48 A | 240 V | 25 ft | J1772 | IP67 |
| ChargePoint HomeFlex | Up to 50 A | 240 V | Detached, ~18–25 ft typical | J1772 or NACS (Tesla) | NEMA 3R (Weather-resistant) |
| ShockFlo S1 | Up to 48 A | 240 V | 17 ft | J1772 | UL/Energy Star certified |
Notable observations:
- Both Emporia Classic/48A and Grizzl-E Ultimate deliver 48 amps, providing faster charging than the Grizzl-E Classic’s 40 amps.
- ChargePoint HomeFlex leads with 50 amps max, offering the highest power output among these models.
- Cable lengths vary, with Emporia and Grizzl-E models offering generous 24–25 ft cables, while ShockFlo’s 17 ft cord may limit installation flexibility.
- Connector compatibility is critical: Emporia and ChargePoint support both the traditional J1772 and the emerging Tesla NACS connector, advantageous for Tesla owners.
- Weatherproofing is robust across all; Grizzl-E’s IP67 rating is outstanding for rugged outdoor use, and Emporia’s NEMA Type 4 enclosure provides watertight protection indoors and outdoors.
Real-World Charging Performance and Usability
Technical specs set expectations, but practical experience reveals true value:
-
Emporia Classic/48A: Testing confirmed it consistently delivers near its rated amperage, enabling efficient Level 2 charging that fully replenishes most EV batteries overnight. The 25-foot cable offers excellent reach, and the watertight enclosure supports safe outdoor installation. Its app allows scheduling during off-peak hours and power adjustments to minimize electricity costs. However, some users report false GFCI tripping when paired with breakers that have built-in GFCI protection—a notable installation consideration.
-
Grizzl-E Classic and Ultimate: Known for ruggedness, both models feature sturdy aluminum casings and IP67 dust and waterproof ratings, handling harsh weather like rain and snow without issue. The Ultimate 48A model provides approximately 15% faster charging than the Classic 40A, reducing typical EV charging time by about an hour. Grizzl-E’s app supports scheduling and amperage adjustments but is more basic, with occasional Wi-Fi connectivity drops and a less refined interface compared to competitors. For those prioritizing durability and cost-effectiveness, Grizzl-E remains a compelling option.
-
ChargePoint HomeFlex: Excelling in smart features and flexibility, this charger supports adjustable amperage from 16 to 50 amps, accommodating diverse electrical setups. The ChargePoint app provides real-time monitoring, remote start/stop, notifications, and seamless integration with North America’s largest EV charging network. At 50 amps, it outputs up to 12 kW, roughly 20% faster than standard 40A chargers. While cable length varies and ships detached—necessitating electrician involvement—the unit’s reliability and extensive support justify its premium price.
-
ShockFlo S1: Delivering a solid 48 amps, ShockFlo’s 17-foot cable is shorter than most competitors, which may restrict placement options in certain garages or driveways. The app supports Wi-Fi and Bluetooth but has a confusing interface that can hamper usability. Mounting hardware is basic, better suited to concrete or block walls rather than drywall. Despite these drawbacks, the charger performs reliably in daily use, maintaining steady power delivery and thermal safety, offering good value if cable length and app polish are less critical for you.
Common Limitations and Reliability Considerations
Each charger has unique limitations to keep in mind:
-
False GFCI Tripping: The Emporia Classic series can experience nuisance GFCI trips caused by conflicts between its built-in GFCI and breakers with integrated GFCI protection. This aligns with National Electrical Code considerations when using NEMA 14-50 outlets for Level 2 charging. Solutions include upgrading to compatible breakers or opting for hardwired installations instead of plug-in models.
-
Cord Length Constraints: ShockFlo’s 17-foot cable is notably shorter than the recommended minimum of 20 feet, potentially limiting installation flexibility. Grizzl-E Classic and Emporia offer longer cables (24–25 ft), better accommodating various parking configurations and reducing cord strain.
-
Wi-Fi and App Reliability: Grizzl-E’s app connectivity can be unstable, requiring occasional manual intervention to manage charging schedules. ChargePoint’s app is more polished and robust but depends on consistent Wi-Fi connectivity. Emporia’s app is functional but may encounter connectivity issues linked to GFCI nuisance trips.
-
Installation Complexity: ChargePoint HomeFlex’s detached cable design typically requires professional electrician installation, especially for hardwired setups. Conversely, Emporia’s plug-in model with a NEMA 14-50 outlet is more DIY-friendly but may have GFCI compatibility challenges.
Value for Money and Overall Reliability
Evaluating performance relative to price and reliability:
-
Emporia Classic/48A is an excellent value, particularly for Tesla owners seeking NACS compatibility. Its 48-amp charging speed and long cable length make it a robust choice, though buyers should be aware of potential GFCI tripping issues depending on home wiring.
-
Grizzl-E Classic (40A) offers a budget-friendly, durable solution. Its rugged weatherproof design appeals to those who prioritize reliability over app sophistication. The Ultimate 48A variant narrows the speed gap with Emporia at a modestly higher cost.
-
ChargePoint HomeFlex carries a premium price but delivers unmatched smart features, adjustable amperage, and integration with a vast charging network. It is ideal for tech-savvy users valuing flexibility and advanced connectivity.
-
ShockFlo S1 occupies a mid-tier price bracket, providing solid charging performance but limited by shorter cable length and less intuitive app experience. It suits users prioritizing charging power over accessory refinement.
Summary
-
For Tesla or NACS-compatible EVs, the Emporia Classic 48A offers a balanced package of charging speed, cable length, and connector options. Prospective buyers should factor in installation nuances like false GFCI trips.
-
If ruggedness and weather resistance are paramount, Grizzl-E’s IP67-rated chargers deliver exceptional durability at competitive prices, with the Ultimate 48A model offering faster charging.
-
The ChargePoint HomeFlex stands out for its superior app experience, adjustable power settings, and extensive network integration, making it the top choice for users seeking advanced smart features and future-proofing.
-
ShockFlo S1 provides reliable power and thermal safety in a compact form but is limited by cable length and app usability, offering reasonable value for users with simpler needs.
Selecting the right home EV charger depends on your vehicle’s connector type, home electrical capacity, and preference for smart features versus rugged simplicity. All four models reviewed here deliver solid performance and reliability, with distinctions in app usability, cable length, and installation complexity that will influence your best fit.
| Charger Model | Max Amperage | Voltage | Cable Length | Connector Types | Enclosure Rating | App Features | Installation Notes | Notable Limitations |
|---|---|---|---|---|---|---|---|---|
| Emporia Classic/48A | Up to 48 A | 240 V (Level 2) | 25 ft | J1772 or NACS (Tesla) | NEMA Type 4 (Watertight) | Scheduling, power adjustments, off-peak charging | Plug-in with NEMA 14-50 outlet; DIY-friendly | False GFCI tripping with some breakers |
| Grizzl-E Classic | Up to 40 A | 240 V | 24 ft | J1772 | IP67 (Dust & Waterproof) | Basic scheduling and amperage adjustments | Hardwired or plug-in options | Wi-Fi connectivity drops; less refined app |
| Grizzl-E Ultimate 48A | Up to 48 A | 240 V | 25 ft | J1772 | IP67 (Dust & Waterproof) | Basic scheduling and amperage adjustments | Hardwired or plug-in options | Wi-Fi connectivity drops; less refined app |
| ChargePoint HomeFlex | Up to 50 A | 240 V | Detached (~18–25 ft typical) | J1772 or NACS (Tesla) | NEMA 3R (Weather-resistant) | Real-time monitoring, remote start/stop, notifications, network integration | Professional electrician installation recommended | Higher price; cable ships detached |
| ShockFlo S1 | Up to 48 A | 240 V | 17 ft | J1772 | UL/Energy Star certified | Wi-Fi and Bluetooth control; confusing interface | Basic mounting hardware; better for concrete/block walls | Short cable length; less intuitive app |
Troubleshooting Common Issues and Maintenance Tips

Troubleshooting Common Issues and Maintenance Tips
When your home EV charger encounters issues, it’s easy to feel overwhelmed or rush to call for professional help. However, many common problems have straightforward solutions if you understand where to look. From electrical faults like circuit breaker trips to smart app connectivity glitches and physical wear on cables, knowing how to diagnose and address these can save you time and money.
Here’s a practical, evidence-based guide drawing on industry insights and real-world experience.
Diagnosing and Resolving Electrical Issues
Circuit breaker trips are among the most frequently reported electrical problems with home EV chargers. These trips often arise from circuit overload, grounding issues, or ground faults.
-
Circuit Overload: Many homeowners try to run their EV charger on circuits shared with heavy-load appliances such as HVAC systems, washers, or ovens. This overload causes breakers to trip as a safety measure. To diagnose, isolate the charger by unplugging other devices on the same circuit. If the breaker trips even when the charger operates alone, the circuit likely lacks sufficient capacity and requires an upgrade. In this case, consult a licensed electrician for panel and circuit enhancements.
-
Ground Faults and Poor Grounding: Loose connections, missing grounding wires, or compromised insulation can create unintended current paths, triggering trips in the charger or its Ground-Fault Circuit Interrupter (GFCI) breaker. Moisture intrusion, especially in outdoor or damp environments, can worsen this issue. Visually inspect wiring for damage and confirm grounding meets current electrical code standards. Because diagnosing ground faults can be complex and hazardous, professional electrical inspection is strongly recommended.
-
False GFCI Trips: A common frustration with Level 2 chargers connected to NEMA 14-50 outlets is nuisance tripping by GFCI breakers. While GFCI devices provide essential shock protection, they can be overly sensitive to transient currents generated by EV chargers. If you experience frequent false trips, first ensure that your charger and vehicle cables are dry, undamaged, and correctly connected. Check for and apply any available firmware updates from your charger’s manufacturer, as these sometimes improve GFCI compatibility. Persistent issues might require switching to a hardwired charger setup or consulting an electrician about alternative breaker types without built-in GFCI protection.
-
Environmental Factors: Extreme temperatures—both heat and cold—along with moisture can affect electrical components, causing erratic behavior or trips. For example, operating a charger in a poorly ventilated enclosed space can lead to overheating and breaker trips. Whenever possible, install chargers in well-ventilated, temperature-controlled locations to minimize these risks.
When to call a professional: If breaker trips continue despite isolating the charger and verifying cables and connections, it’s time to engage a licensed electrician. Professional expertise is crucial for safely diagnosing grounding faults, upgrading electrical panels, or installing load management solutions.
Addressing Connectivity and Software-Related Problems
Smart EV chargers offer convenient app control and remote monitoring but introduce additional complexity and potential failure points.
-
App Connection Failures: Connectivity problems often stem from Wi-Fi signal issues or restrictive network security settings. Ensure your charger is within effective range of your router and that your home network permits the charger’s internet access without overly restrictive firewalls. Restarting both your charger and router often resolves common glitches.
-
Firmware Updates: Firmware governs charging protocols and safety features. Manufacturers regularly release updates to fix bugs, enhance compatibility, and improve performance. Most modern chargers support over-the-air (OTA) firmware updates via their companion apps or web portals. Keeping firmware current is essential to prevent charging errors, slowdowns, or disconnections.
-
Troubleshooting Steps:
- Observe charger indicator lights; a red flashing light typically signals a fault.
- Cross-reference error codes with your user manual or manufacturer’s support resources.
- Update firmware if an update is available.
- Reboot the charger and reconnect the app.
- If issues persist, perform a factory reset or contact manufacturer support.
-
Compatibility Issues: Around 30% of reported charger failures relate to incompatibilities among the vehicle, charger, or home network. Confirm your charger supports your EV’s charging protocol (e.g., J1772 or NACS) and voltage/amperage requirements. Some chargers may also have limited compatibility with certain smart home platforms, so verify this before purchase.
Preventive Maintenance for Cables, Connectors, and Hardware Longevity
Routine maintenance ensures your charger stays safe and reliable over its lifespan.
-
Inspect Cables and Connectors: Physical wear is inevitable over time. Regularly check cables for cracks, cuts, or stiffness, especially after exposure to cold weather, which can make cables brittle. Look for burn marks, discoloration, or frayed insulation that may indicate overheating or electrical stress.
-
Connector Care: Dirt, debris, or corrosion on charging connector pins can cause poor contact, slow charging, or error codes. Clean connectors gently with a dry cloth. Avoid liquids unless manufacturer guidelines explicitly recommend appropriate cleaning agents.
-
Storage Tips: In freezing conditions, avoid tightly coiling cables immediately after use, as this stresses internal wiring. Instead, loosely coil or hang cables to preserve flexibility.
-
Routine Checks: Incorporate a quick monthly inspection into your maintenance routine. Look for loose wall mounts, unusual sounds during charging, or unexpected interruptions. Early detection can prevent costly repairs.
-
Professional Maintenance: Schedule a professional inspection at least annually. Certified electricians can test grounding integrity, assess breaker and panel health, and assist with firmware updates if necessary. This aligns with industry best practices and manufacturer recommendations.
-
When to Replace: If cables show signs of overheating, persistent charging failures, or physical damage, replacing the cable is safer than attempting repairs. Many manufacturers offer replacement cables at reasonable costs, minimizing risk.
Final Takeaways
Most home EV charger issues stem from electrical installation shortcomings, environmental exposure, or software glitches. A methodical approach—starting with isolating the charger, conducting visual inspections, and updating firmware—can resolve many problems without professional intervention.
However, given the high current and complex electronics involved in EV charging, do not hesitate to call a licensed electrician for persistent breaker trips, grounding faults, or panel upgrades. Annual professional maintenance is a worthwhile investment to ensure safety and optimal charger performance.
Combined with regular physical inspections, diligent app troubleshooting, and keeping firmware up to date, these practices create a smooth, hassle-free charging experience that maximizes your EV ownership benefits. Practical vigilance today prevents headaches tomorrow.
| Issue Category | Common Problems | Causes | Troubleshooting Steps / Solutions | When to Call a Professional |
|---|---|---|---|---|
| Electrical Issues | Circuit Breaker Trips | Circuit overload, grounding issues, ground faults | – Isolate charger by unplugging other devices on same circuit – Check for sufficient circuit capacity – Inspect wiring for damage and grounding compliance – Avoid shared circuits with heavy-load appliances – Consult electrician for panel upgrades | If breaker trips persist despite isolation and cable checks; for grounding faults and panel upgrades |
| False GFCI Trips | GFCI sensitivity to transient currents, moisture, damaged cables | – Ensure cables and charger are dry and undamaged – Apply firmware updates – Consider hardwired charger setup – Consult electrician about alternative breaker types | Persistent nuisance trips despite troubleshooting | |
| Environmental Factors | Extreme temperatures, moisture, poor ventilation | – Install chargers in well-ventilated, temperature-controlled locations | For complex issues related to environmental damage | |
| Connectivity & Software | App Connection Failures | Wi-Fi signal issues, restrictive network settings | – Ensure charger is near router – Allow charger internet access – Restart charger and router | When issues persist after basic troubleshooting |
| Firmware Issues | Bugs, compatibility problems | – Keep firmware updated via OTA updates – Follow manufacturer instructions for updates | For firmware update failures or complex errors | |
| Troubleshooting Steps | Indicator lights, error codes, app resets | – Observe indicator lights – Cross-reference error codes – Update firmware – Reboot charger and app – Factory reset or contact support if unresolved | When user troubleshooting fails to resolve issues | |
| Compatibility Issues | Incompatible vehicle, charger, or network | – Verify charger supports EV protocols (J1772, NACS) – Confirm voltage/amperage compatibility – Check smart home platform compatibility | Before purchase; consult support for complex compatibility problems | |
| Maintenance | Cable and Connector Wear | Cracks, cuts, stiffness, burn marks, corrosion | – Regularly inspect cables and connectors – Clean connector pins gently with dry cloth – Avoid liquids unless recommended | For serious physical damage or persistent failures |
| Storage and Handling | Cable stress from improper coiling | – Loosely coil or hang cables in freezing conditions to preserve flexibility | Not applicable | |
| Routine Checks | Loose mounts, unusual sounds, interruptions | – Perform monthly visual and functional inspections | When abnormalities detected | |
| Professional Maintenance | Annual inspections | – Hire certified electrician for grounding tests, breaker and panel health, firmware assistance | At least once annually or as recommended | |
| Cable Replacement | Overheating signs, persistent failures, physical damage | – Replace cables rather than repair – Purchase manufacturer-approved replacements | When damage or failures are evident |
Advanced Optimizations and Future-Proofing Your Home EV Charging Setup
Advanced Optimizations and Future-Proofing Your Home EV Charging Setup
For homeowners with multiple EVs or those planning to integrate renewable energy sources like solar panels and home battery storage, a basic plug-and-charge setup is no longer sufficient. Advanced load management, intelligent scheduling, and adaptability to evolving connector standards such as the North American Charging Standard (NACS) are essential. These strategies help maximize charging efficiency, avoid costly electrical upgrades, and future-proof your home EV charging investment.
Load Management for Multiple EVs and Solar/Battery Integration
Charging multiple EVs simultaneously without oversight can overwhelm your home’s electrical system, leading to tripped breakers or potentially hazardous overloads. Load management solutions intelligently allocate available power, ensuring safe charging for all vehicles, even if that means slightly reduced charging speeds during peak demand.
Key approaches include:
- Adaptive load management systems utilize current transformers (CT clamps) to monitor real-time whole-home power consumption. They dynamically modulate charging amperage to prevent overloads, enabling simultaneous EV charging without necessarily upgrading your electrical panel.
- Products like the Emporia Pro EV Charger deliver Level 2 charging up to 48 amps and feature PowerSmart load balancing with integrated whole-home energy monitoring for seamless operation.
- For households with more than two EVs, advanced load managers such as PSP’s SAK series support multiple chargers drawing up to 100 amps each, balancing loads efficiently across all connected vehicles.
Integrating solar panels or home battery storage adds complexity but also significant benefits:
- Solar panels generate electricity during daylight hours, which smart chargers can prioritize to power EVs directly, reducing reliance on grid electricity and lowering utility bills. Since solar output varies throughout the day, chargers with solar-first or solar-optimized charging modes—enabled by smart energy meter integration—are invaluable.
- Home battery storage systems like the Tesla Powerwall 3, LG RESU PRIME, or Generac PWRcell buffer excess solar energy. They enable EV charging during evening or grid peak hours without increasing grid demand or triggering high demand charges.
- Smart energy management platforms coordinate when to draw power from solar panels, batteries, or the grid based on availability, pricing signals, and user preferences, maximizing renewable energy use and cost savings.
To implement this effectively, pair your EV charger with an energy management app or platform offering:
- Real-time monitoring of solar generation and household electricity consumption.
- Automated load balancing across multiple EVs.
- Priority scheduling to utilize stored solar energy during peak grid rate periods.
Scheduling for Off-Peak Electricity Rates
Electricity rates often vary throughout the day with cheaper off-peak hours. Smart scheduling of EV charging can significantly reduce your electricity bills while easing strain on the grid.
- Utilities and third-party programs like California Public Utilities Commission’s (CPA) EV SmartCharge and DTE Energy’s Smart Charge shift charging loads automatically to low-demand periods. Participation in these programs is especially advantageous for customers on time-of-use (TOU) rate plans.
- Managed charging programs may also offer incentives or rewards for charging during off-peak hours, turning your EV charger into a tool for grid-friendly energy use.
- Many smart chargers include app-based scheduling features, allowing manual configuration of charging windows or automatic alignment with tariff schedules.
Practically, scheduling charging to start after midnight or in the early morning hours often yields the best savings. Some chargers further optimize energy use by pausing charging once the battery reaches a preset state of charge, avoiding unnecessary power consumption.
Adapting to Evolving Connector Standards: NACS Adoption
The North American Charging Standard (NACS), originally developed by Tesla, is rapidly becoming a dominant connector type in the U.S. EV market. By 2025, major automakers such as Ford, General Motors, Hyundai, and Porsche plan to equip their vehicles with NACS ports, signaling a shift in the charging ecosystem.
- While the J1772 (AC Level 2) and CCS (Combined Charging System) connectors remain prevalent, the growing NACS adoption requires homeowners to consider future compatibility.
- Network operators like ChargePoint have confirmed support for NACS cables, and several smart chargers now offer native NACS connector support or compatible adapters.
- If you intend to switch EV brands or share your charger with others, it is wise to invest in chargers offering multi-standard compatibility or modular connector options to avoid obsolescence.
Future-proof your charging setup by selecting hardware that can adapt to evolving connector standards through firmware updates or plug-in adapters.
Upgrade Paths for Higher Amperage Chargers and Smart Home Integration
As EV battery sizes increase and charging technology advances, chargers capable of delivering higher amperages—up to 80 amps—are becoming the new benchmark for fast home charging.
- An 80-amp Level 2 charger can provide up to approximately 19.2 kW, reducing charging times significantly for large-battery EVs.
- Installing such chargers typically requires a dedicated 100-amp circuit breaker and appropriately sized wiring, which can increase installation complexity and cost.
- Homes with main electrical service panels rated between 100 and 200 amps might require panel upgrades or additional subpanels to accommodate high-amperage chargers or multiple simultaneous chargers.
Smart home integration is another critical consideration for optimizing your charging experience:
- Leading smart chargers connect via Wi-Fi or Ethernet, enabling remote monitoring, control, scheduling, and firmware updates.
- Integration with smart home platforms such as Home Assistant, Apple HomeKit, Amazon Alexa, or Google Assistant allows automation based on grid conditions, energy prices, or user preferences.
- Smart chargers can extend charger and battery lifespan by pausing or throttling charging once the battery is full or during peak grid demand periods, reducing energy waste and wear.
Maximizing Charger Lifespan and Preparing for Emerging Technologies
Your EV charger represents a long-term investment. Proper maintenance and choosing features that promote durability will pay dividends in reliability and cost savings.
- Install chargers in covered or temperature-controlled locations to avoid exposure to extreme weather conditions that can degrade components or cause overheating.
- Utilize smart charging features to prevent overcharging and reduce heat buildup, which can accelerate wear.
- Perform regular inspections of charging cables and connectors, checking for cracks, brittleness, corrosion, or other damage that could impair charging reliability.
- Keep charger firmware updated to benefit from ongoing efficiency improvements, bug fixes, and new functionality.
Looking ahead, bidirectional charging technologies—enabling vehicle-to-home (V2H) or vehicle-to-grid (V2G) energy flow—are emerging but still in early stages of adoption.
- Preparing your home electrical infrastructure with compatible chargers and smart energy management systems will simplify future upgrades.
- Bidirectional chargers offer potential benefits such as providing backup power during outages, supporting grid stability, and generating revenue through demand response programs.
Key Takeaways:
- Use load management solutions to safely and efficiently charge multiple EVs while integrating solar panels or battery storage, avoiding costly electrical panel upgrades.
- Schedule charging during off-peak hours via smart chargers or utility programs to lower electricity costs and reduce grid stress.
- Select chargers compatible with emerging connector standards like NACS to ensure future interoperability.
- Consider upgrading to higher amperage Level 2 chargers (up to 80 amps) for faster charging, while planning for potential electrical service upgrades.
- Integrate your EV charger with smart home platforms for enhanced control, automation, and charger longevity.
- Maintain your charger regularly and leverage smart features to maximize lifespan and prepare for new technologies such as bidirectional charging.
Implementing these strategies ensures your home EV charging setup stays efficient, cost-effective, and ready to meet the evolving demands of electric vehicle ownership.
| Category | Details |
|---|---|
| Load Management | Adaptive load management with CT clamps; products like Emporia Pro EV Charger (48A, PowerSmart load balancing); PSP’s SAK series for >2 EVs (up to 100A each) |
| Solar & Battery Integration | Solar-first charging modes; battery storage (Tesla Powerwall 3, LG RESU PRIME, Generac PWRcell) buffers energy; smart energy management platforms coordinate power sources |
| Scheduling for Off-Peak Rates | Programs like CPA EV SmartCharge and DTE Energy Smart Charge; app-based scheduling; charging during low-demand hours reduces bills and grid strain |
| Connector Standards Adaptation | Emerging NACS standard adoption by major automakers; chargers with multi-standard or modular connectors; firmware updates and adapters for future-proofing |
| Higher Amperage Chargers & Smart Integration | Up to 80A Level 2 chargers (~19.2 kW); may need 100A circuit breakers and panel upgrades; Wi-Fi/Ethernet connectivity; integration with Home Assistant, Apple HomeKit, Alexa, Google Assistant |
| Charger Lifespan & Emerging Tech | Install in protected locations; use smart features to reduce wear; regular cable/connector inspections; keep firmware updated; prepare for bidirectional charging (V2H, V2G) |
| Key Takeaways | Use load management for multiple EVs and solar/battery integration; schedule off-peak charging; select chargers with NACS compatibility; consider upgrading amperage; integrate with smart home platforms; maintain regularly; prepare for bidirectional charging |

Yeddabox for iPhone 14 Case Cute Striped Phone Case Soft TPU Slim Shockproof Phone Cover for Women Girls, Blue and White
$12.49 (as of October 2, 2025 06:34 GMT +00:00 - More infoProduct prices and availability are accurate as of the date/time indicated and are subject to change. Any price and availability information displayed on [relevant Amazon Site(s), as applicable] at the time of purchase will apply to the purchase of this product.)
TAURI for iPhone 17 Pro Max Case, Full Camera Protection, Anti-Yellowing Military-Grade Protection Shockproof Slim Phone Case for iPhone 17 ProMax, Clear
$7.99 (as of October 2, 2025 06:34 GMT +00:00 - More infoProduct prices and availability are accurate as of the date/time indicated and are subject to change. Any price and availability information displayed on [relevant Amazon Site(s), as applicable] at the time of purchase will apply to the purchase of this product.)
FireNova Magnetic for iPhone 17 Pro Case, Compatible with MagSafe, [Integrated Silicone Camera Control Button] [Camera Protection] Anti-Scratch Microfiber Lining Phone Case, 6.3", Calke Green
$12.98 (as of October 2, 2025 06:34 GMT +00:00 - More infoProduct prices and availability are accurate as of the date/time indicated and are subject to change. Any price and availability information displayed on [relevant Amazon Site(s), as applicable] at the time of purchase will apply to the purchase of this product.)
ORNARTO Compatible with iPhone 17 Pro Max Case 6.9", Slim Liquid Silicone 3 Layers Soft Gel Rubber Shockproof Protective Cover with Anti-Scratch Microfiber Lining-Chalk Pink
$6.28 (as of October 2, 2025 06:34 GMT +00:00 - More infoProduct prices and availability are accurate as of the date/time indicated and are subject to change. Any price and availability information displayed on [relevant Amazon Site(s), as applicable] at the time of purchase will apply to the purchase of this product.)